
If you’ve ever thought about making money from your website the prospect may have seemed daunting. There is a myriad of ways to generate revenue from your website. While your first thought may be to start running ads, there’s a better way: monetizing your content.
When you run a content-driven website using a paywall plugin, you have more control over your revenue than you do with an ad-based revenue model. If your website is already populated with premium content then you can easily set this up using a plugin called Zlick.
Zlick is a self-service one-stop shop for content creators to sell premium content and manage their subscribers.
In our review of Zlick, we’ll take a deep look into how the plugin works and some suggested uses that can work for you.
Overview of Zlick
Whether you create all your own content or you hire writers to write guest posts, you can earn revenue from it. Rather than putting all your eggs in the ad basket, you can sell your premium content and have better control over your revenue generation.
The Zlick paywall plugin allows you to set up a paywall on your WordPress site easily and quickly.

With Zlick, you can focus on content quality. Zlick claims that ad-generated revenue tends to produce clickbaits and low-quality content, while subscription-based revenue gives you the motivation to focus on the content quality. It’s a logical assumption, and I think that having more control over the content displayed on your website is a win-win for both you and your visitors.
If you’d like to make the switch from ads to subscriptions, Zlick provides you with the tools to monetize your premium content so you can build a business around it.
Additionally, Zlick employs a server-side solution, rather than JavaScript. That means the paywall can’t be bypassed and you don’t have to worry about losing revenue by someone hacking the script.
Let’s go over the setup process, which is fairly straightforward but I’ll give you some tips for some areas that aren’t as intuitive as others.
How to Create a Subscription Service with Zlick
Setting up a paywall with the Zlick plugin is a little different than other plugins you may be used to. Whereas most plugins provide all their settings within the WordPress dashboard, with Zlick you’ll first take care of most of the configuration and setup on their website. After that’s handled, you’ll be able to manage the settings after installing the plugin.
Let’s get started!
Step 1: Create an Account
As I mentioned, the first thing you’ll need to do is create a free account on the Zlick website.
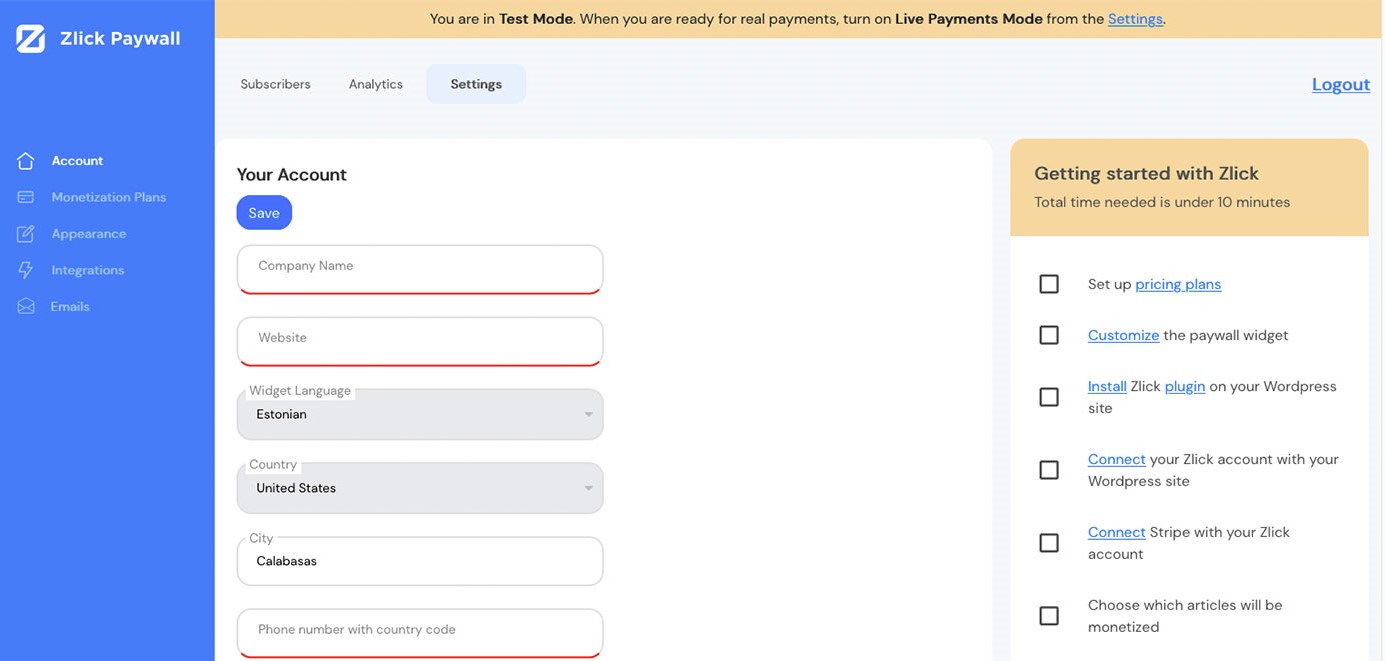
I found the Zlick portal interface to be elegant and intuitive to navigate. That was promising, as I’ve found that when attention is paid to the UI, the back end functions are usually as well thought-out.
You’ll notice that they tell you that the “total time needed is 10 minutes.” I found that to be mostly true, although they like to promote faster setup times – likely to drive home the point that the setup really is quick and easy. I wasn’t much concerned with how fast I could set things up, just wanted it to work.
The fields on the first screen are simple enough. You’ll just fill in your personal information and info about your business.
Step 2: Set up your pricing
The next screen is where you’ll set up your Monetization Plans. There are two types of pricing you’ll need to decide on: Article Pricing and Subscription Pricing.
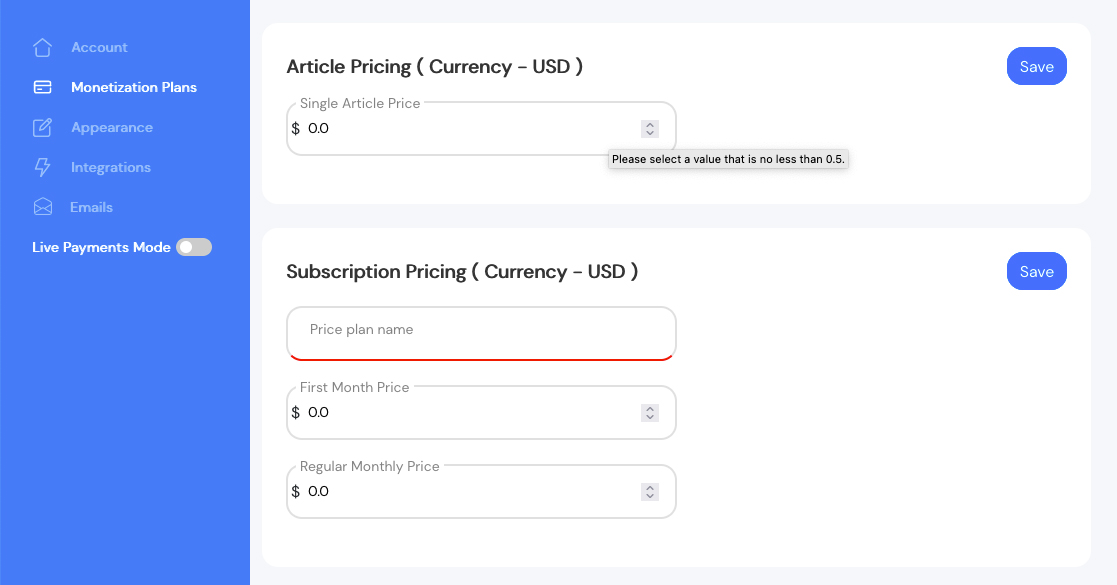
With Article Pricing, you’ll fill in how much you want to charge visitors for reading a single article. The minimum is $.50 USD, and you can go as high as you want. If you’re new to the subscription service model, it’s probably a good idea to start low, and then increase the amount as you see how it performs over time.
In Subscription Pricing you’ll determine how much you’ll charge monthly. There’s an option for a First Month Price. Again, the minimum here is also $.50 USD, and it’s a good opportunity to create a low barrier to entry for new subscribers.
Whatever you decide to charge on the outset, you can always revisit the Monetization Plan settings and adjust accordingly.
Step 3: Customize the paywall widget
Next, you’ll head over to Appearance and customize the paywall widget that shows up as readers scroll through your content.
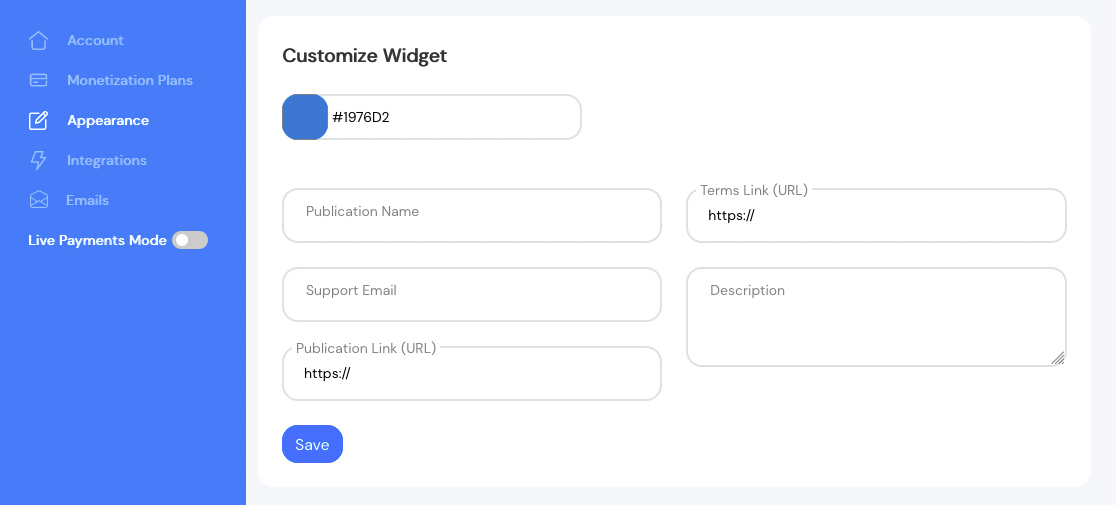
Here, you’ll be able to customize the widget to match your brand identity: change colors, customize texts, and provide a link to your terms and conditions.
There’s a handy color picker at the top, or you can enter the appropriate hex code in the field. The other fields are fairly self-explanatory. Once you fill them in and save, you can preview your widget just below the main section.
Step 4: Install the Zlick Paywall plugin on your WordPress site
Now that you’ve completed the setup on the Zlick website, it’s time to install the plugin. As with most plugins, you can install Zlick right from your WordPress dashboard.
- In WordPress, navigate to Plugins → Add new
- Search for Zlick
- Install and then activate the Zlick Paywall plugin
- After activation, access it from the menu on the left (Settings → Zlick)
Step 5: Connect your Zlick account with your WordPress site
Next, you’ll need to integrate your Zlick account with your website. In the WordPress dashboard, navigate to Settings → Zlick.

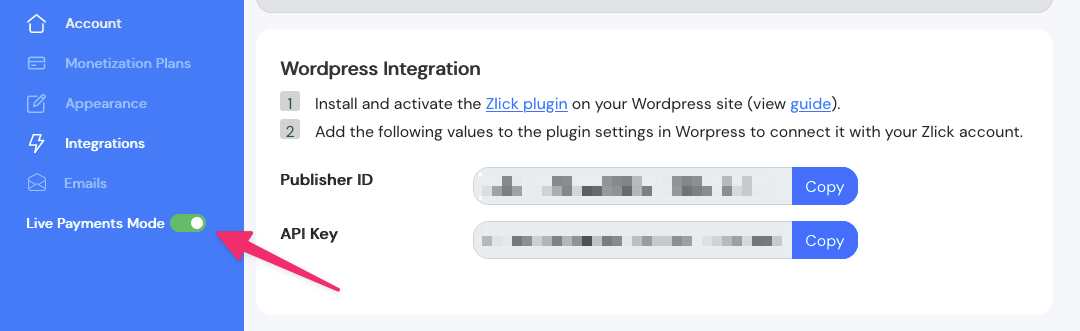
In this area, you’ll fill in your personal Publisher ID and API Key. You’ll get that info from your Zlick account portal under Integrations:
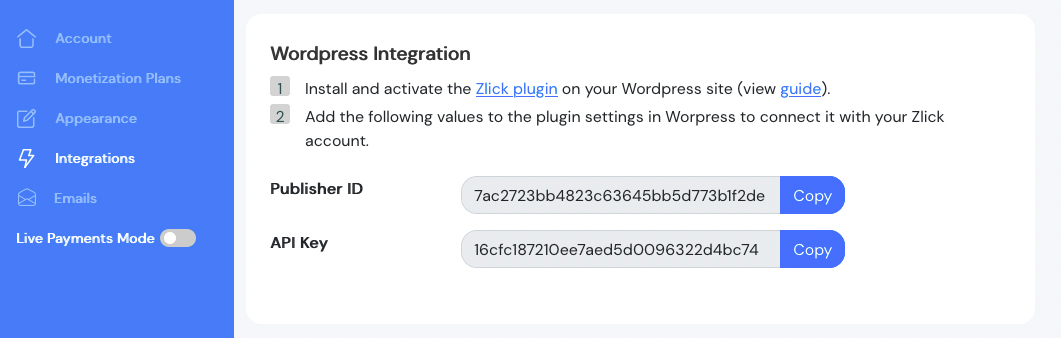
This would also be a good time to determine the number of Preview Paragraphs your visitors can read before the paywall widget appears. You can change this later, and you may want to do that once you get a sense for how your visitors are interacting with your content.
Step 6: Connect Stripe with your Zlick account
You’ll need a way to receive payments for your subscriptions, and Zlick uses Stripe as their payment gateway. According to their website, “Connecting with Stripe is 100% trusted and safe. They are the largest and most used platform for online transactions globally and that’s why we use them.”
They make it easy to do. Going back to your Zlick account portal, head over to Settings → Integrations. Under Card Payments, you’ll see a Connect with Stripe button. Just click the button and you’ll be guided through the steps to create an account on Stripe.

Step 7: Choose which articles will be monetized
This step is probably the easiest part of the whole process. The determination of which articles will be monetized is handled right inside the post editor.
- Go to the edit post page
- Scroll down and find the Zlick Settings area
- Select the checkbox to enable the paywall for this article

The ability to control which articles fall under your subscription service is a powerful feature. It opens up opportunities to offer certain posts at no charge, allowing readers to sample your content before deciding to subscribe.
Step 8: Turn on Live Payment Mode
In Test Payments mode you can use test credit card data that Zlick has set up in advance for you:
Name: any
Card number: 4242 4242 4242 4242; CVC 242
Expiry: 04/24
Once you are ready for Live payments, head to your account portal on the Zlick website. From there:
- Find the Live Payment Mode button from the Settings.
- Flick it on and you are ready to accept real money.
- You can hop between Testing and Live environment with this switch.
Once you’ve completed all the steps in the setup process, your subscription service is ready to start generating revenue from your content.
Using Analytics to Help You Grow
As you can probably guess, creating a subscription service model is not a “set-it-and-forget-it” proposition. Yes, there’s content creation, but you knew that – it’s why you’re here.
Understanding which of your content sells best is the key to growing your business. Zlick provides useful analytics so you can get a snapshot of how your content is performing.
In your account portal on the Zlick website, navigate to the Analytics tab at the top of your account menu. Here you’ll be able to analyze Active Subscribers, Current month revenue, Current month projected revenue, as well as statistics about your new subscribers. The most effective for understanding top-performing content may be the Top Content By Sales reports.
Using the insights derived from your analytics, you’ll understand which of your content appeals most to your customers, and you can create more like it.
Pricing
As you can tell by going through the process outlined here, the cost to setup a paywall with Zlick is zero. They do have a tiered pricing structure that’s based on transaction fees. However, what you get under the Starter tier of their pricing model is pretty substantial:
- Up to 5,000 customers
- Customizable Widget
- CRM
- Up to 100 External Subscribers
- Analytics
- Card payments
- Apple Pay/Google Pay
With a 5% transaction fee, you only pay when you get paid.
Their Essential and Premium tiers offer things like white label customization, unlimited subscribers, an API, custom reports, newsletter, and mobile carrier payments.

Create a Full Self-service Content Subscription Model with Zlick
There are other ways to set up a subscription service on your WordPress website, but Zlick really is a one-stop shop. They’ve created a paywall plugin that makes it super easy to get started – and manage as your subscriptions grow.
There are a few features that would be nice to see in future, such as:
- Custom CSS or additional appearance options for the widget
- More choices for payment gateways besides Stripe, Apple, and Google Pay
- The ability to set minimum pricing lower than $ .50 USD
If you’ve struggled with generating revenue through ads, you’re tired of displaying ads, or you just want to increase revenue with an additional method, a subscription service that relies on quality content that you control could be the ticket.
The Zlick paywall plugin can help you make the switch from ad-generated revenue to subscriptions. In only ten minutes, you could be running a business that’s based on your premium content rather than relying on ads.
0 comments:
Post a Comment