
Searching for a way to build a community website using WordPress?
Building your own community is a great way to grow an engaged audience and create an online space that you own.
If you create a Facebook group, you’re growing Facebook’s platform. But when you create your own community website, you own the platform.
In this step-by-step guide, you’re going to learn how to create a WordPress community website using the free, open-source BuddyPress plugin.
However, while BuddyPress includes all of the core features that you need for a community, it’s not enough if you want to create something really engaging.
To fix that, you’ll further learn how to improve your website’s community engagement using other plugins, such as a BuddyPress chat plugin like AtomChat.
Let’s dig in!
Before getting to the tutorial, let me quickly give you an example of the types of community websites that you’ll be able to build by following this guide.
First off, you’ll be able to create a page that lists all of your site’s members:

Users can add a friendship from that page or open the member’s full profile to see more details, such as that user’s activity stream.
To facilitate conversions, you’ll be able to add real-time chat using AtomChat. Members can chat with other users via text by default, but you can also enable audio and/or video chat:

To build sub-communities with your site, users can create and join their own user groups. AtomChat will also allow group members to chat within the group in real-time, including group audio or video calls if enabled.
This is just a high-level look to give you an idea of what you can build. On your own community, you’ll get a ton of additional settings to customize it to your liking.
Now, let’s get into the step-by-step guide for how you can create a community website using WordPress.
For this guide, we’ll assume you’re already able to create a fresh WordPress install on your hosting. From there, we’ll take you through the other steps needed to create your WordPress community website.
To kick things off, you’ll want to choose a WordPress theme that’s optimized for community websites.
Because of how popular BuddyPress is, you can find a lot of great BuddyPress themes. Here are two examples to start you off:
For this example, we’ll use the free BuddyX theme.
You can find more by browsing theme marketplaces:
2. Set Up BuddyPress
Once you have your theme, you’re ready to install and activate the free BuddyPress plugin from WordPress.org.
Enable Components
Once you activate the plugin, head to Settings → BuddyPress to configure its settings.
First, you’ll want to choose which “components” to enable, which are core features. For example, friend connections and activity streams.

Choose whichever options make sense for your community. In the next section, you’ll learn how to extend this functionality, such as setting up a BuddyPress chat plugin.
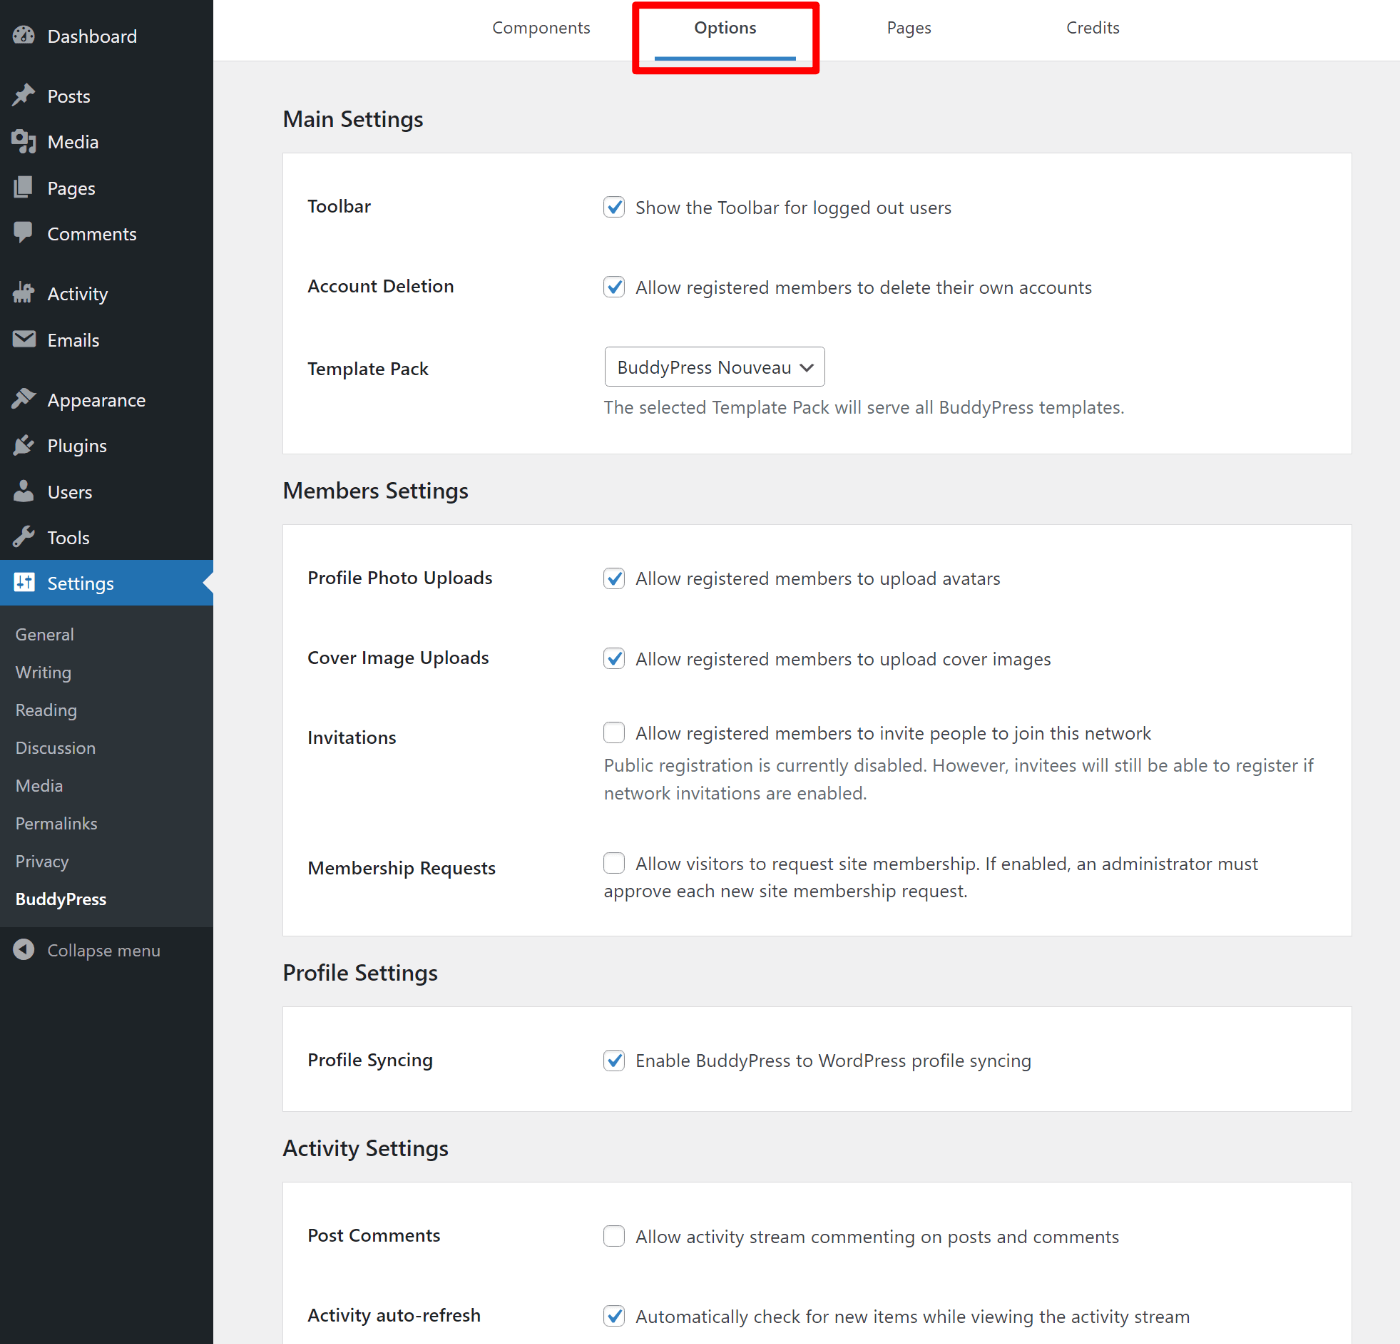
Configure Options
Next, go to the Options tab to configure some basic functionality for your community:
And that’s it for the basic setup! You now have a functioning, albeit basic, community website.
Now, it’s time to enhance it with features to create a better experience for your community members.
3. Add Features to BuddyPress to Improve Engagement
BuddyPress acts as the foundation of your community website.
However, BuddyPress by itself is probably not enough if you want to create a vibrant community as it’s lacking some of the features that your users will expect.
Let’s talk about how to add three useful features to create a more engaging community website:
- Real-time chat (much like how Facebook users can chat with one another).
- Gamification to encourage users to interact more.
- Automation, such as automatically posting in the activity feed when a user completes a certain action.
Real-time Chat (incl. Group Chat)
One big area where you can improve BuddyPress is communication between members.
While users can send each other private messages, there’s no option for real-time chat…which kind of feels like you’re forcing people back into forums from the early aughts.
Users have grown to expect more real-time communication methods. For example, Facebook has long had easy live messages and even Reddit added a live chat system.
To set this up, you can use a BuddyPress chat plugin like AtomChat. AtomChat adds one-on-one text chats to your community, along with group chats for your BuddyPress user groups.
You can also enable audio and video chat if you want to give members even more ways to engage.
Here’s how to set it up…
Install and Connect to AtomChat
To begin, install and activate the free AtomChat plugin from WordPress.org on your community website.
Then, go to the new AtomChat tab in your WordPress dashboard and add your AtomChat license key:

You can get your license key by registering for an AtomChat account. AtomChat is a paid service, but you’ll get a 15-day free trial.
When you register for AtomChat, you’ll be prompted to enter the domain name of your community website in a simple onboarding wizard:

You’ll then see your license key, which is what you need to add to the plugin’s settings in your WordPress dashboard. You can also find it by visiting the licenses page in your AtomChat account.
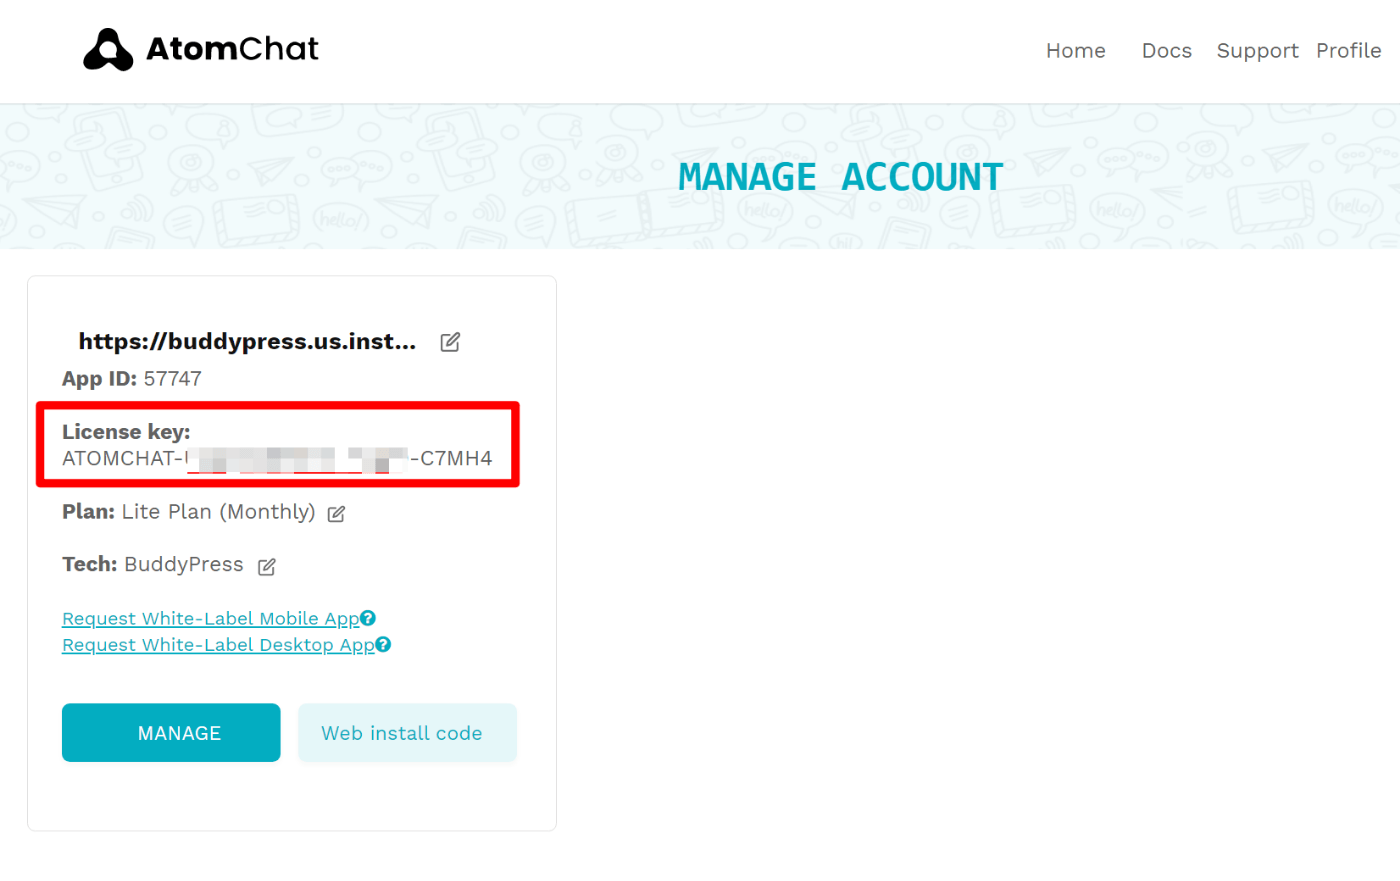
Once you add the license key, you’ll need to also add your auth key and API key.

You can find those in your AtomChat admin panel:

Configure AtomChat settings
At this point, your BuddyPress real-time chat is already active. You can test it out by opening the frontend of your site and starting a chat:

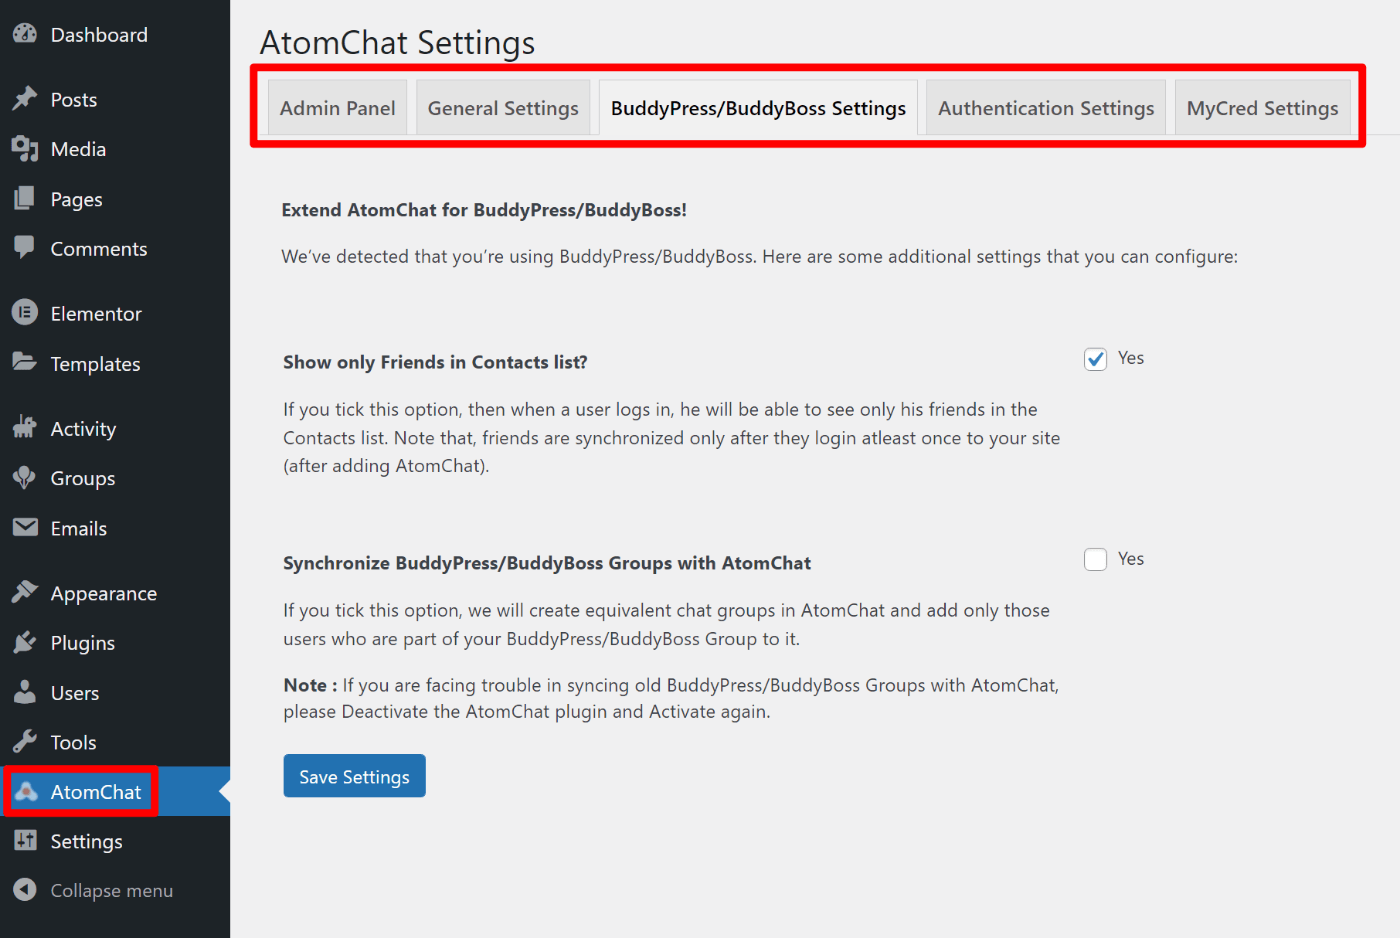
To configure the real-time chat functionality, you can open the plugin’s settings by going to the AtomChat tab in your dashboard.
For example, AtomChat will only show a user’s friends in the chat contacts list by default. However, you can change this to show all members if you prefer:
To configure other details, such as matching the branding to your site or changing notification sounds, you can use your cloud AtomChat dashboard:

You can also enable new features in the Features tab. For example, audio chat, video chat, file sending, and more:

Gamification
Another area where you can boost engagement is adding gamification to your community. You can set this up using a plugin like myCred, which has dedicated integrations with BuddyPress.
You can also integrate AtomChat with myCred, which gives you further opportunities for gamification.
Automation
Automations give you another way to boost engagement by sending emails, adding tags to users for customization, and pretty much anything else.
For example, based on a user’s action, you could trigger custom emails, private messages, activity statuses, and more.
To set this up, you can use a plugin like Uncanny Automator.
At this point, you have a fully functioning community website, complete with engaging features like real-time chat for one-on-one messages and groups.
To recap, here’s all you need to do to build a community website:
- Choose a BuddyPress-compatible WordPress theme.
- Install and configure the BuddyPress plugin.
- Expand on the core plugin with new features such as a BuddyPress chat plugin like AtomChat.
Of course, there is one more step – adding members! To handle that, check out our guide to increasing website traffic.
Once you start attracting members to your site, you’ll have a vibrant community where members can become friends, create groups, and chat with each other in real-time via text, audio, or video.
Do you still have any questions about how to build a WordPress community website with BuddyPress and AtomChat? Let us know in the comments!
0 comments:
Post a Comment