
Ever wished that you could create a new WordPress install just by clicking a button?
You could easily test that plugin from WordPress.org, start working on that new client site, or even let your customers preview a plugin that you’re selling to convince them to make their purchase.
InstaWP is a service that can handle all of those use cases and more. You can spin up a fresh WordPress install just by clicking a button, including using pre-set templates and configurations to save time. You can even share links that let other people spin up a site using your template – plus a lot more.
In our InstaWP review, we’ll take a hands-on look at this tool and show you how you can use it to improve your WordPress workflows.
InstaWP Review: A High-Level Look at What It Does

The basic premise of InstaWP is quite simple:
It lets you (or other people) quickly spin up a fresh WordPress install. There’s no messing around with hosting – you just click a few buttons and you have a working WordPress install that you can use for testing or development.
Think of them like sandbox WordPress sites.
You can start the site as a blank, fresh WordPress install. Or, you can create your own templates to automatically pre-install certain themes and plugins or configure settings (such as the PHP version of the sandbox) in a certain way.
You can let a site automatically expire after a certain amount of time or you can have it persist until you manually delete it.
So – what might you use these sandbox sites for? I see three main use cases:
- Testing stuff for your own sites – you can test out a new plugin or theme before installing it on your live site. Or, you can just play around with different settings and configurations.
- Building client sites – you can use the site to develop the client site. By hosting it on InstaWP instead of using a local development tool, you get benefits such as being able to access the site from anywhere and share live links with your clients for review.
- Letting potential customers test your WordPress plugin or theme – if you sell your own plugin or theme, you can configure it so that potential customers can easily spin up a sandbox to test things. You can pre-install the plugin that you sell so that people can start testing right away.
Here are some other notable features:
- White-label custom domain – you can use your own custom domain for the sandbox sites, which is great if you’re an agency or you’re offering testing for your WordPress plugin.
- Full access – you still get access with FTP, SSH, database editing, etc.
- Team members – you can create teams and add other team members, which is great for agencies.
- Slack integration – you can create a fresh WordPress install just by typing /wp in Slack.
- Chrome integration – you can use the Chrome extension to add a Launch button to WordPress.org theme and plugin pages that lets you create a new site that pre-installs that extension – great for fast testing of new plugins.
How to Use InstaWP to Create WordPress Sites
Now that you know what InstaWP does, let’s get into how you can use InstaWP to spin up sites.
I’ll start by showing you how to create a blank WordPress install, which won’t take long because it’s super simple. Then, I’ll get into some of the more advanced features, such as creating pre-set templates or configurations.
Creating a Fresh WordPress Install
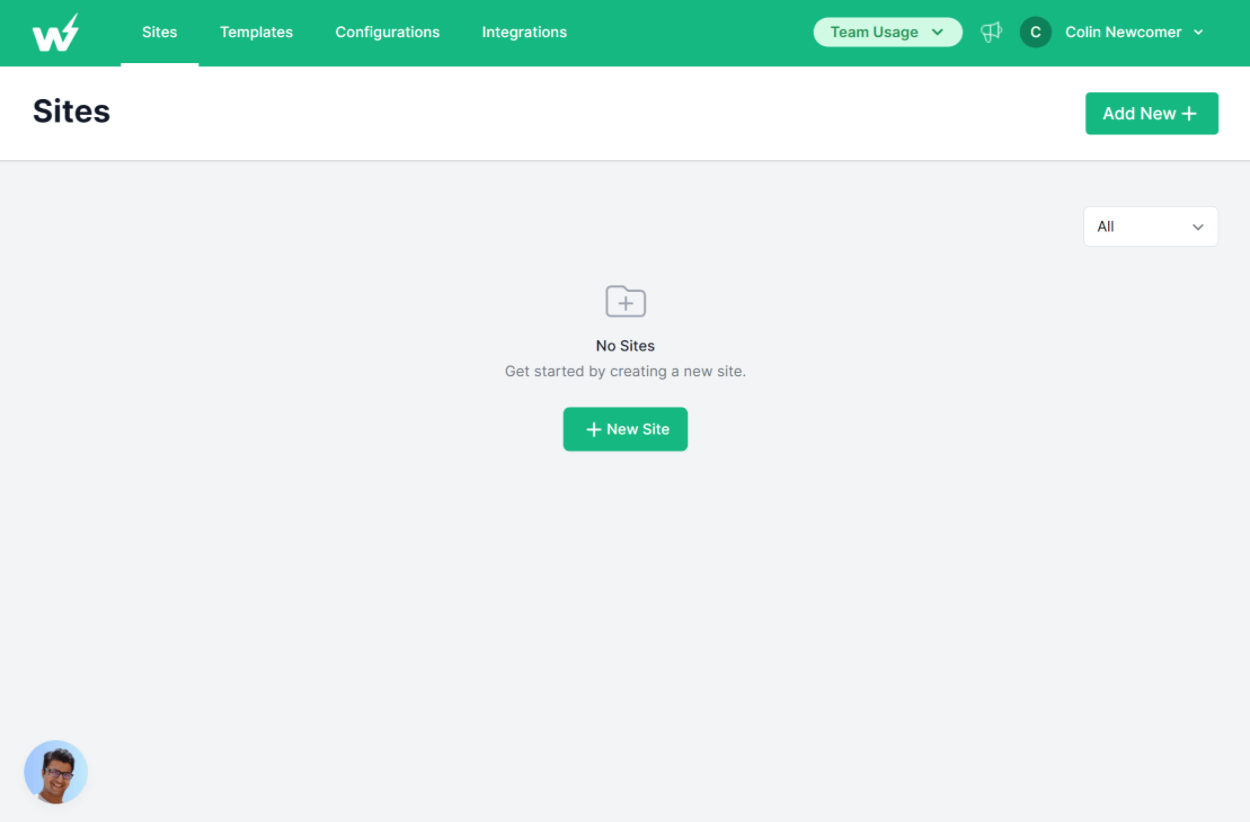
Once you register for a free InstaWP account, you can create a new site by clicking the New Site or Add New buttons in the Sites tab of your dashboard:
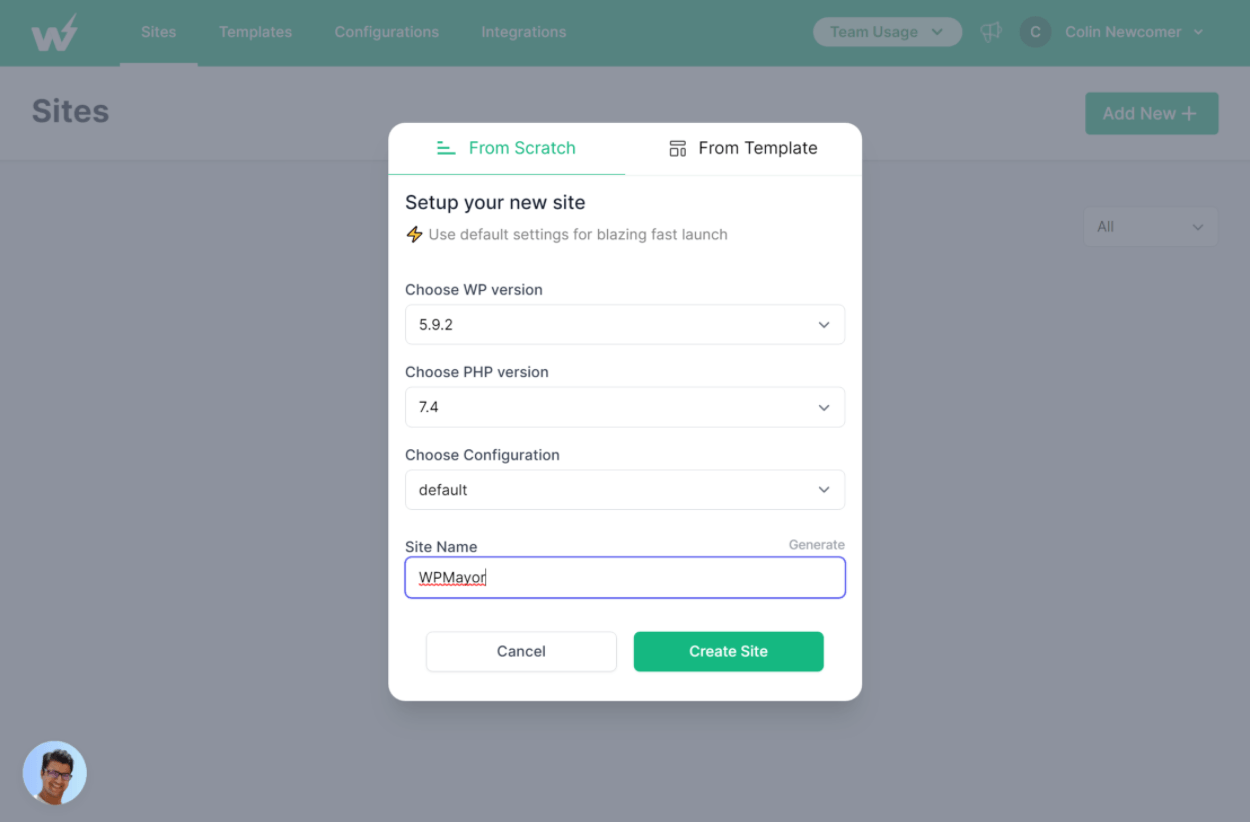
This will open a popup where you can configure the basics of your site:
- WordPress version.
- PHP version.
- Default configuration (more on this next).
- Site name.
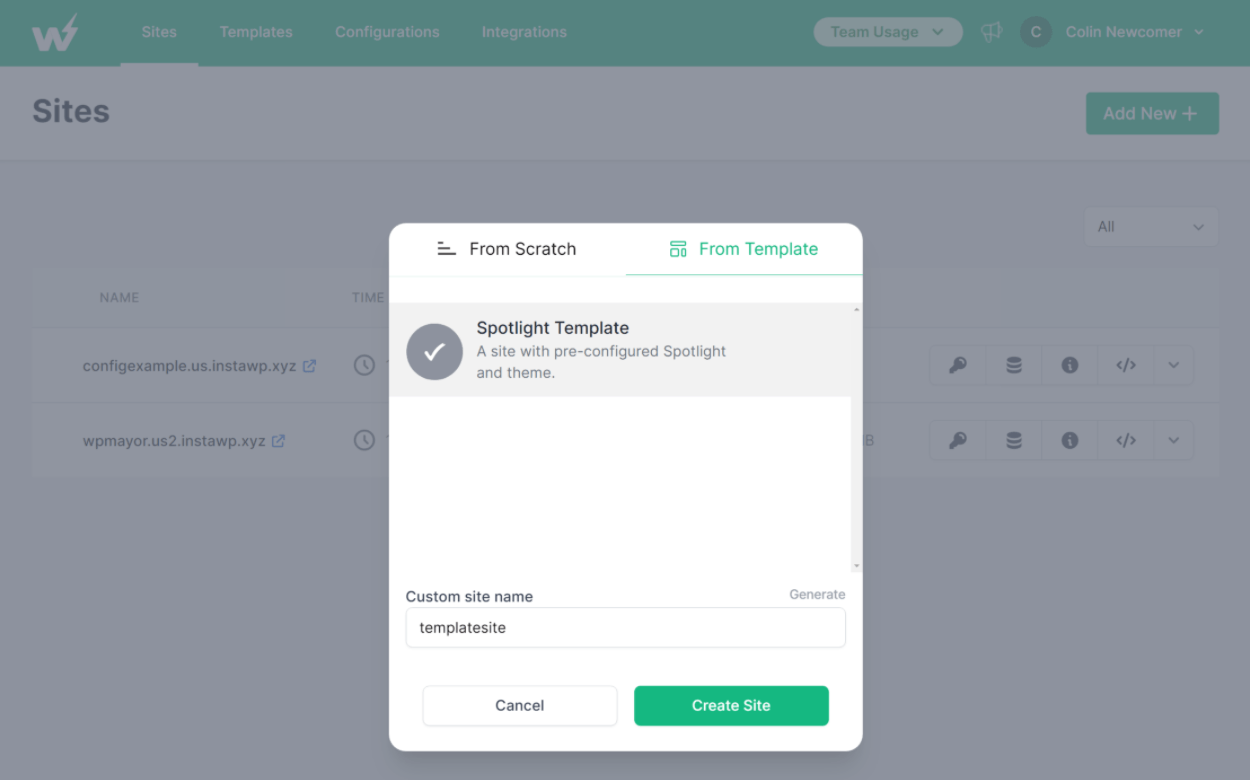
Or, you can also create your site based on a template, which I’ll also cover in the next section:
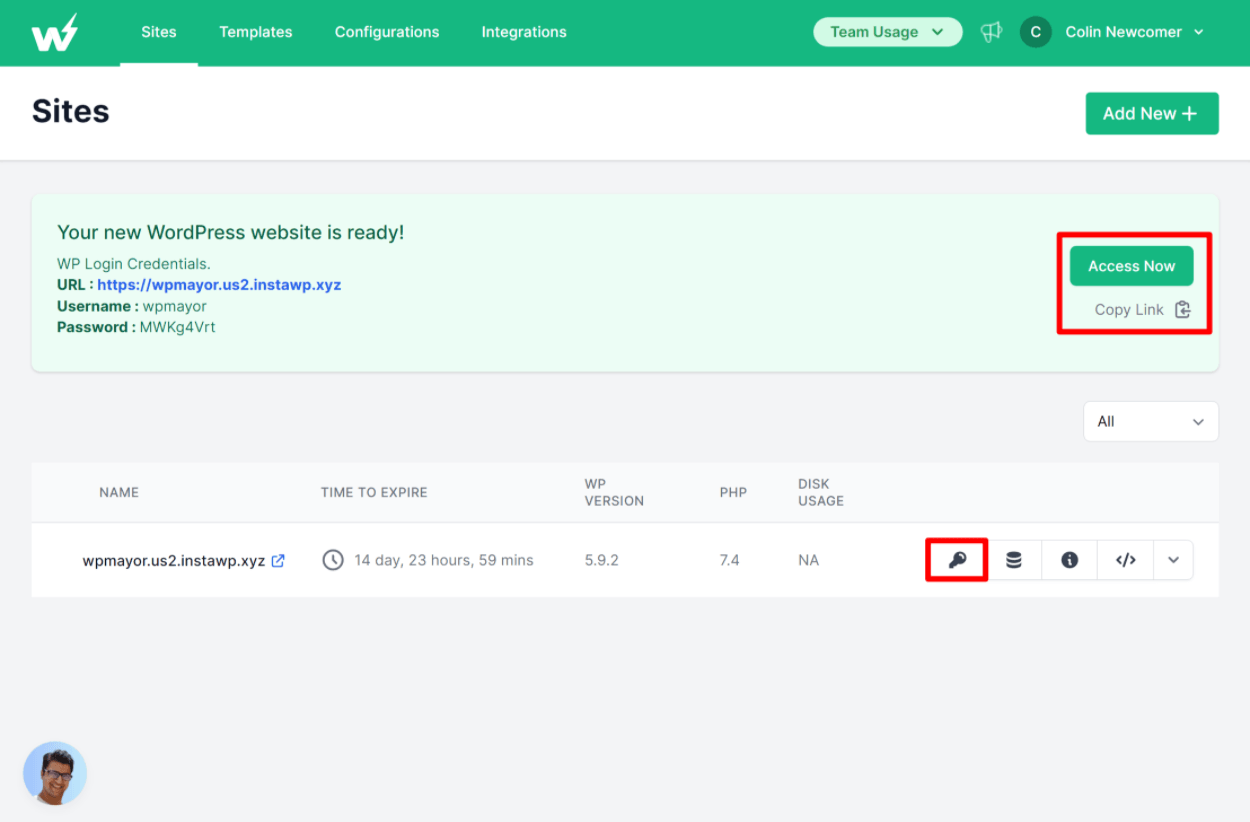
And that’s it! You have a working WordPress install.
You can log in using the credentials that are provided or you can just click the Auto-Login button to log in just by clicking a link (instead of needing to manually enter the username and password):
Inside the WordPress dashboard, it works exactly like any other self-hosted WordPress install. You can install plugins and themes, adjust settings, add users, and so on.
Accessing Your Site and Using Tools
In addition to accessing the WordPress dashboard by clicking the auto-login link, InstaWP also gives you a number of other tools for accessing and managing your site, which you can use from the Sites dashboard:
The Open Database option lets you open the site’s database in Adminer:

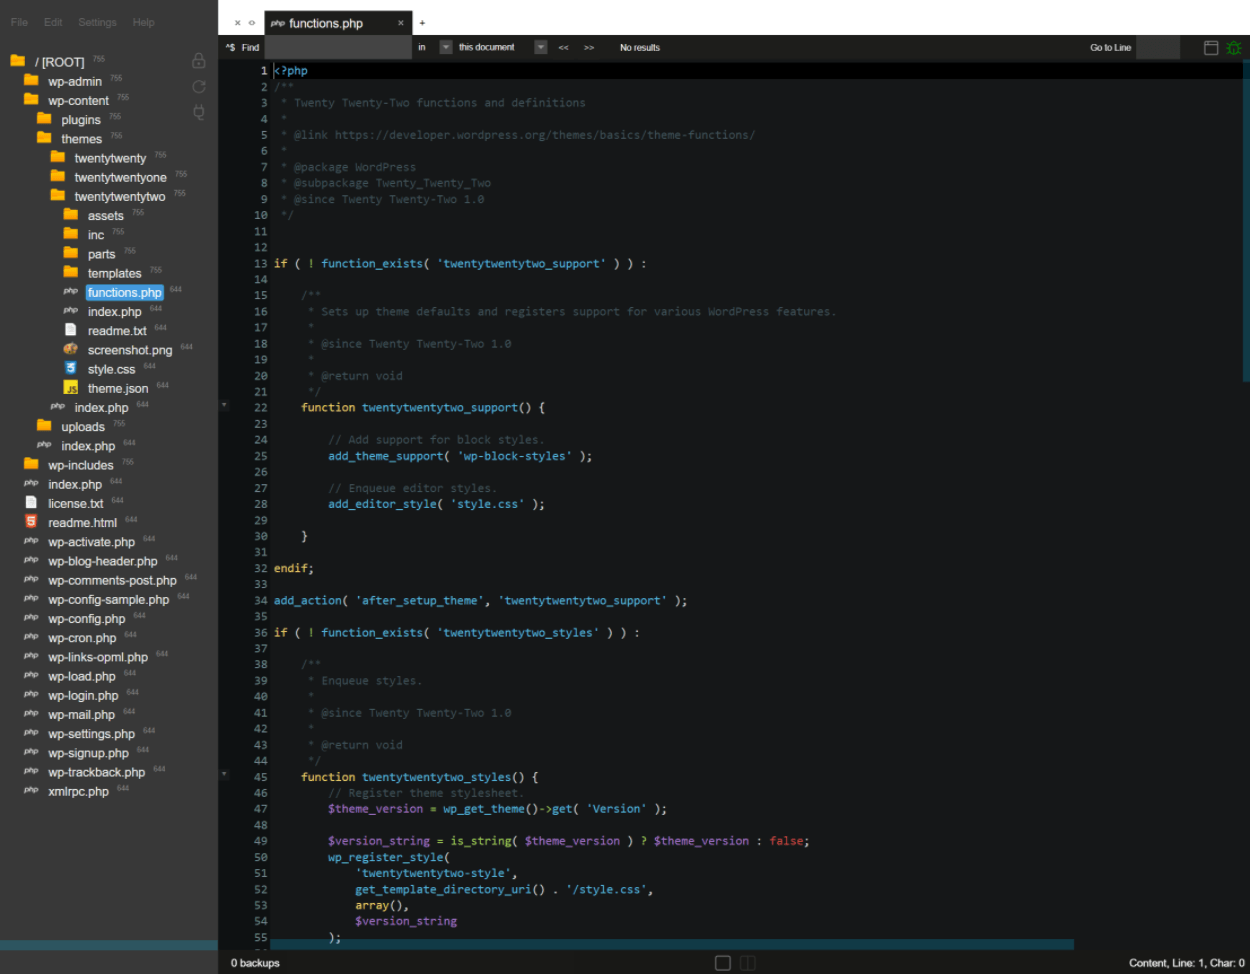
The Code Editor button opens an in-browser code editor where you can edit all of the core files, plugins, and themes. This is really handy for making quick edits without needing to use FTP (though you can do that too). You can also create new files:
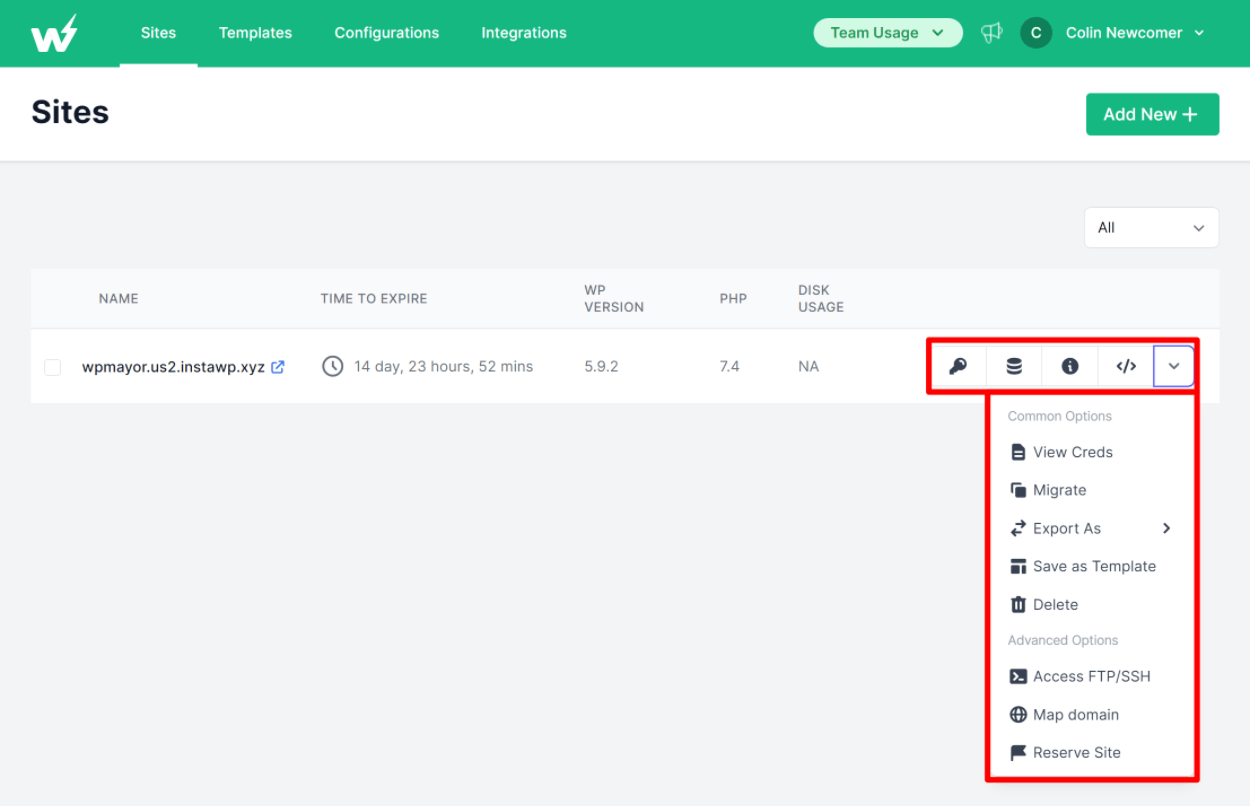
In the drop-down, you can also perform the following:
- Migrate the site to live hosting using a built-in Migrate Guru integration. Migrate Guru is my personal favorite when it comes to migration plugins, so I think it’s a great choice and very convenient.
- Export the site as a zip file to use in LocalWP (for local development).
- Access FTP/SSH.
- Map a custom domain to this sandbox site.
- Reserve the site so that it doesn’t automatically expire (AKA create a permanent install until you manually delete it).
Creating Templates and Configurations
To help you save time when creating sites, InstaWP lets you set up two types of presets:
- Configurations – this lets you create a preset for technical details such as the PHP version, WordPress version, PHP configuration, WordPress configuration, and so on. You can also pre-install certain plugins or themes.
- Templates – this lets you save an existing site as a template. You can then create new sites by using that template and those sites will look exactly like the original site.
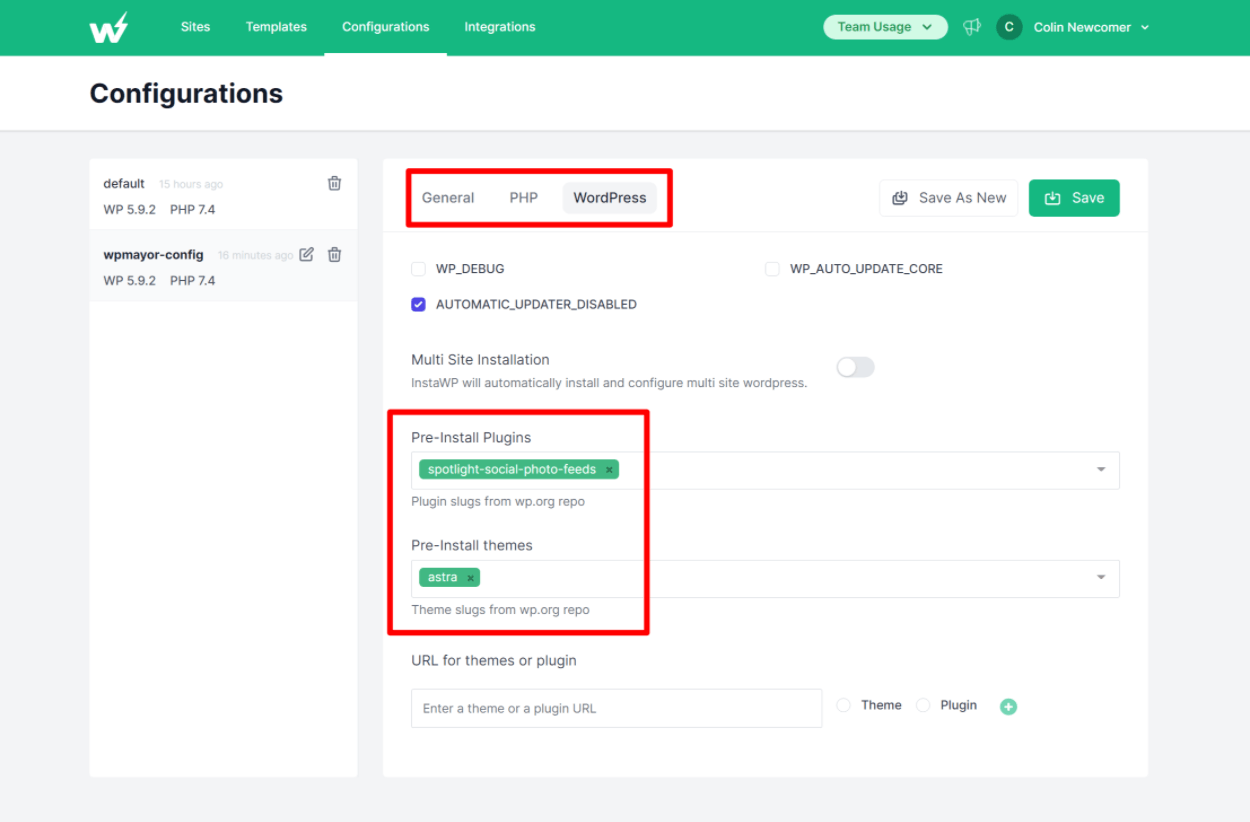
Configurations
You can create a new configuration from the Configurations tab in the dashboard.
There are three settings tabs for each configuration:
- General – WordPress and PHP versions.
- PHP – PHP configuration settings (e.g. memory limit or max upload size).
- WordPress – the most flexible. You can add themes and plugins to pre-install, either from WordPress.org or from any direct URL. You can also enable a multi-site installation.
You can create as many configurations as needed – they’ll show up in the sidebar of the interface. You can then choose a configuration when you create a new WordPress site:

Templates
Templates are similar to configurations. However, the key difference that I can see is that templates let you go beyond just pre-installing plugins/themes by letting you also save your settings.
For example, a configuration would let you pre-install the Spotlight plugin, but a template would let you do that and have already configured an Instagram feed in Spotlight. The same is true for theme settings, user settings, WordPress settings, and so on.
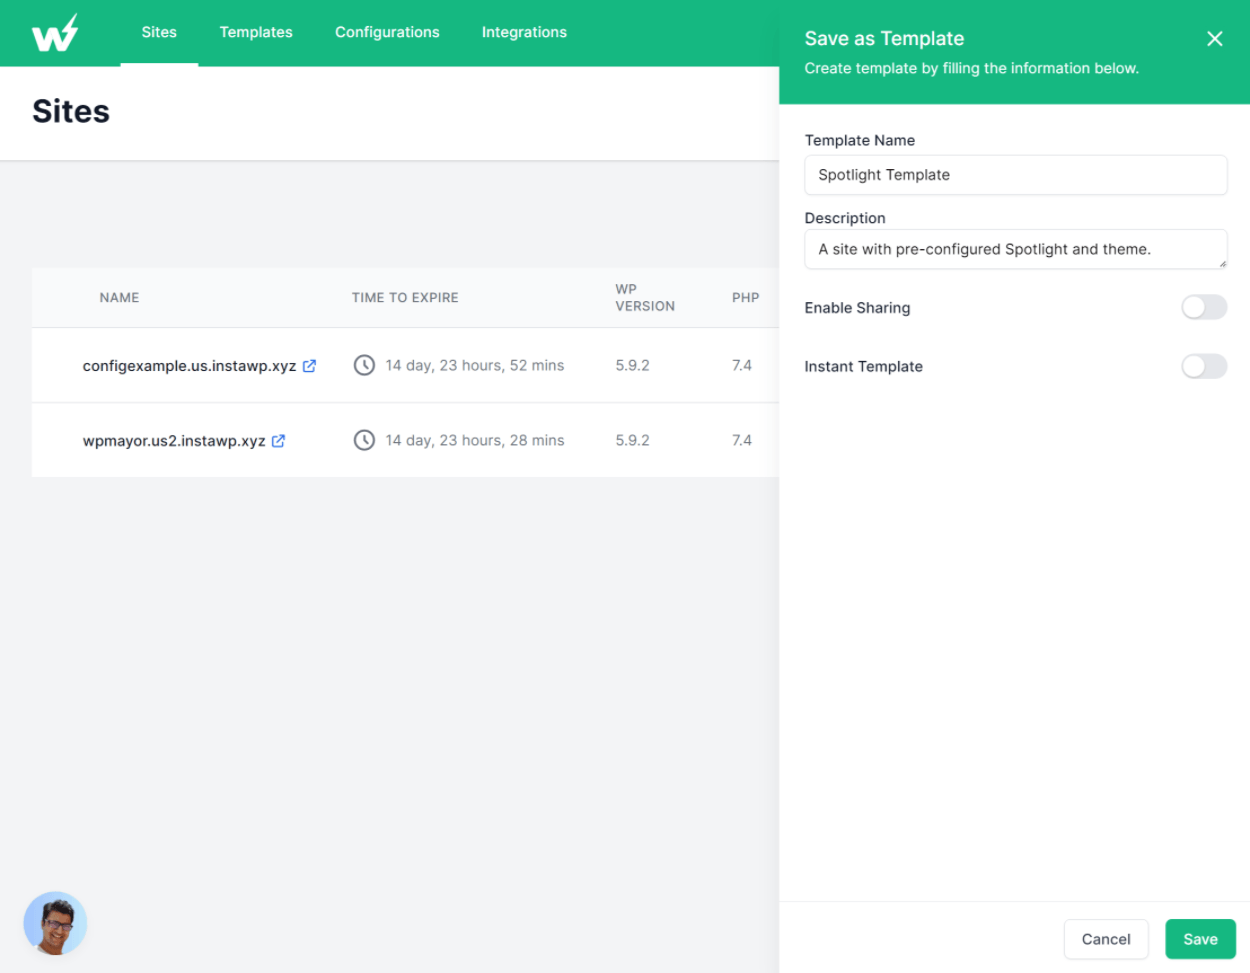
To create a template, open the drop-down for an existing site that you want to save as a template and choose the Save as Template option.
This will open a slide-out where you can configure some options:
- Template name and description – these help you remember what it does.
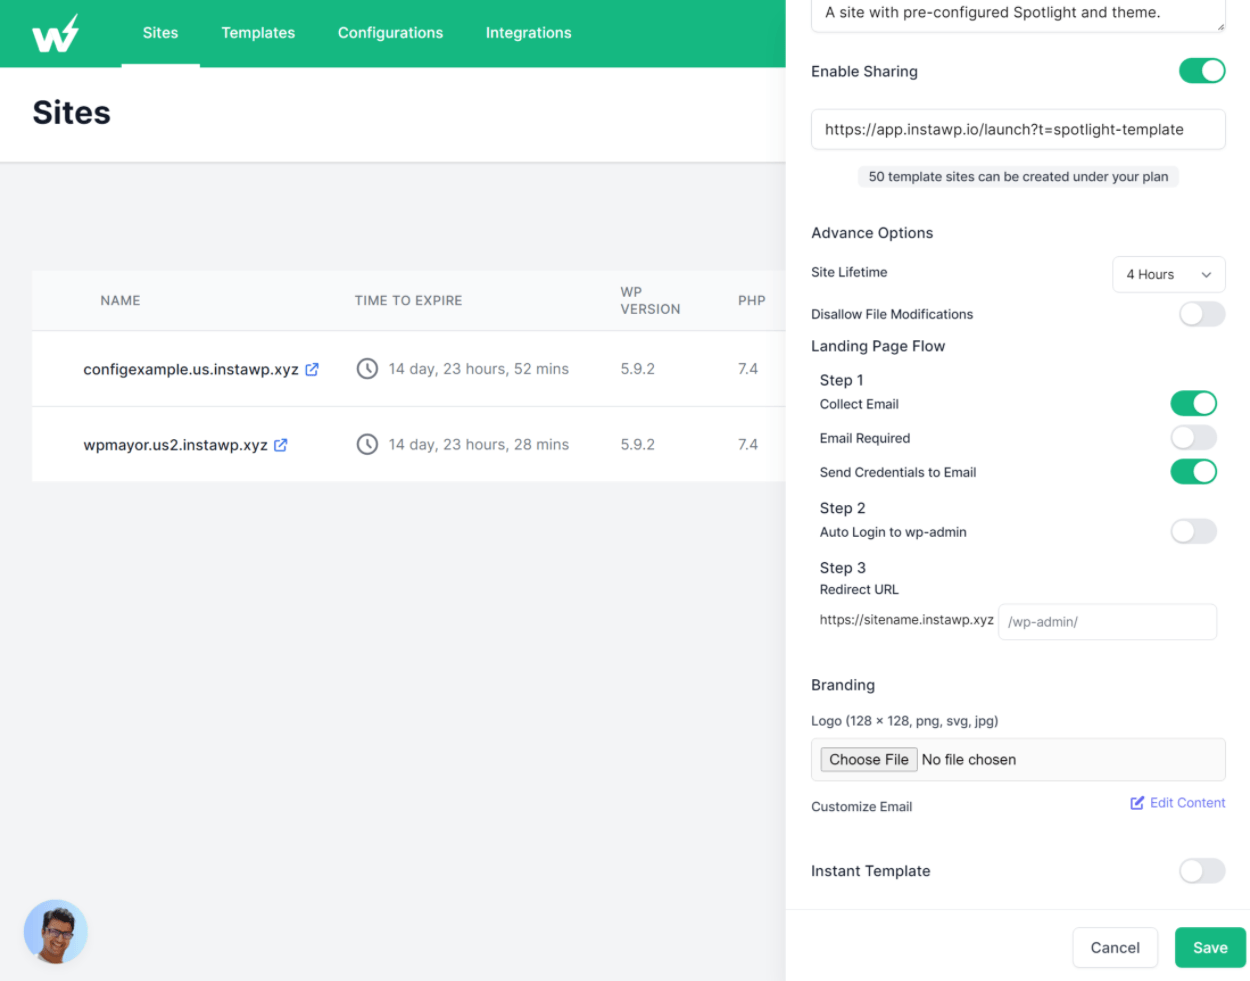
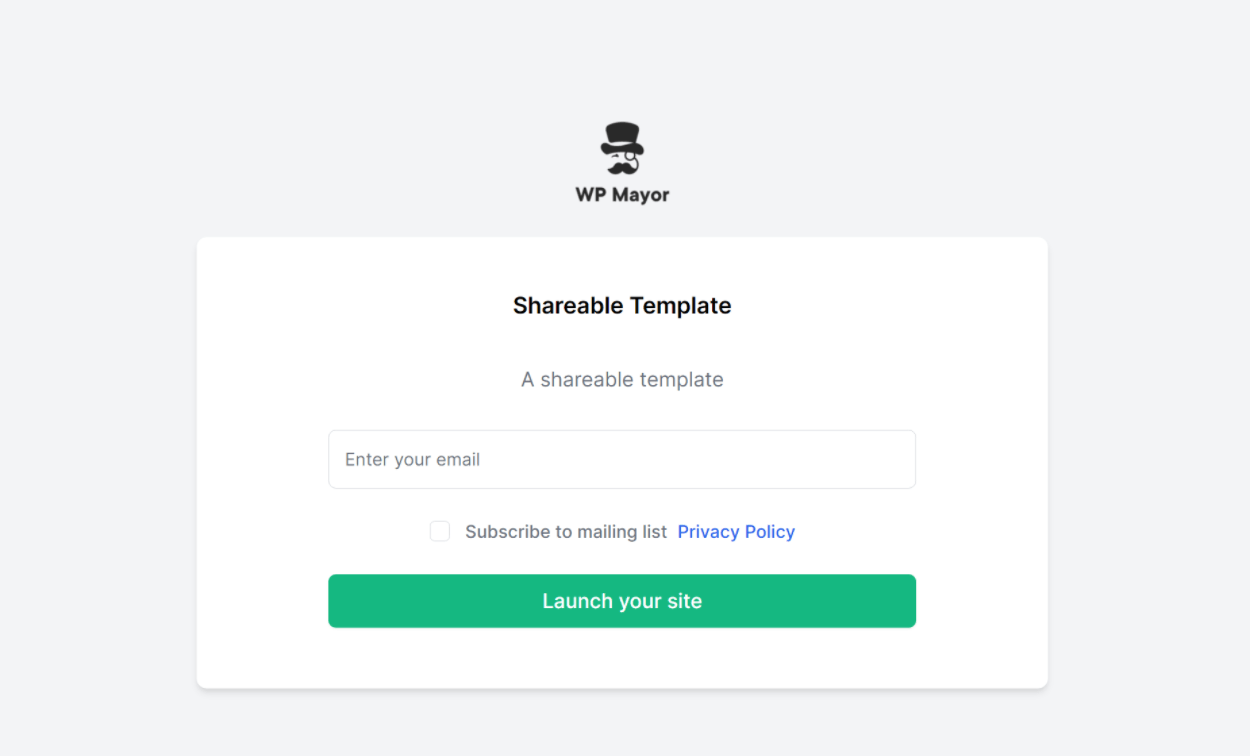
- Enable Sharing – this lets other people create a site based on the template by clicking a link. If you’re a theme/plugin developer who wants to offer potential customers test sites, this is what you’d use. All the customer needs to do is click the shared link and they can create their own test install.
- Instant Template – it will automatically create a site based on the template (instead of requiring additional user action). This is especially useful if you’re sharing your templates.
If you do enable sharing, you’ll get some additional options. One nice feature is that you have the option to require people to enter their emails (and then you can collect those emails). This lets you use your test sites as a lead gen tool.
You can even customize the email that people receive and add to your own branding:
Once you create a template, it will show up in the Templates tab:

You can also choose that template when creating a new site:
If you create a shareable template, people will get a nice landing page when they click the link (if you require email opt-in):
Using the Chrome Extension
If you need to test a lot of plugins and themes, InstaWP also offers a convenient Chrome extension.
When you activate the Chrome extension, it will add a new Launch button to the WordPress.org theme and plugin pages.
If you click that button, it will automatically create a fresh WordPress site and pre-install the theme or plugin that you’re looking at. I don’t think you could create any easier method for testing themes and plugins:

InstaWP Pricing
InstaWP offers both free and paid plans.
In general, the free plan should work fine if you’re just a casual user looking to test some things.
However, if you’re a freelancer or agency building client sites (or just a solo user who builds a lot of sites), you’ll probably want one of the paid plans. The same is true if you’re a WordPress product owner looking to let potential customers test out your plugin or theme before purchasing.
The free plan offers the following:
- Create up to five active sites.
- Sites expire after two days (there’s no way to create a permanent install on the free plan, which is why it’s better for short-term testing).
- Restore up to three sites per month.
- Create up to one pre-set template.
- 500 MB max storage for your account.
If you upgrade to one of the premium plans, you can get access to some or all of the following features:
- Higher site limits and longer default expiration times.
- Option to reserve sites so that they don’t expire (they’re permanent until you delete them).
- Custom domain names and white-labeling.
- Full technical access via FTP, SSH, etc.
- Teams and team members.
- More templates and more advanced template options.
- Site cloning.
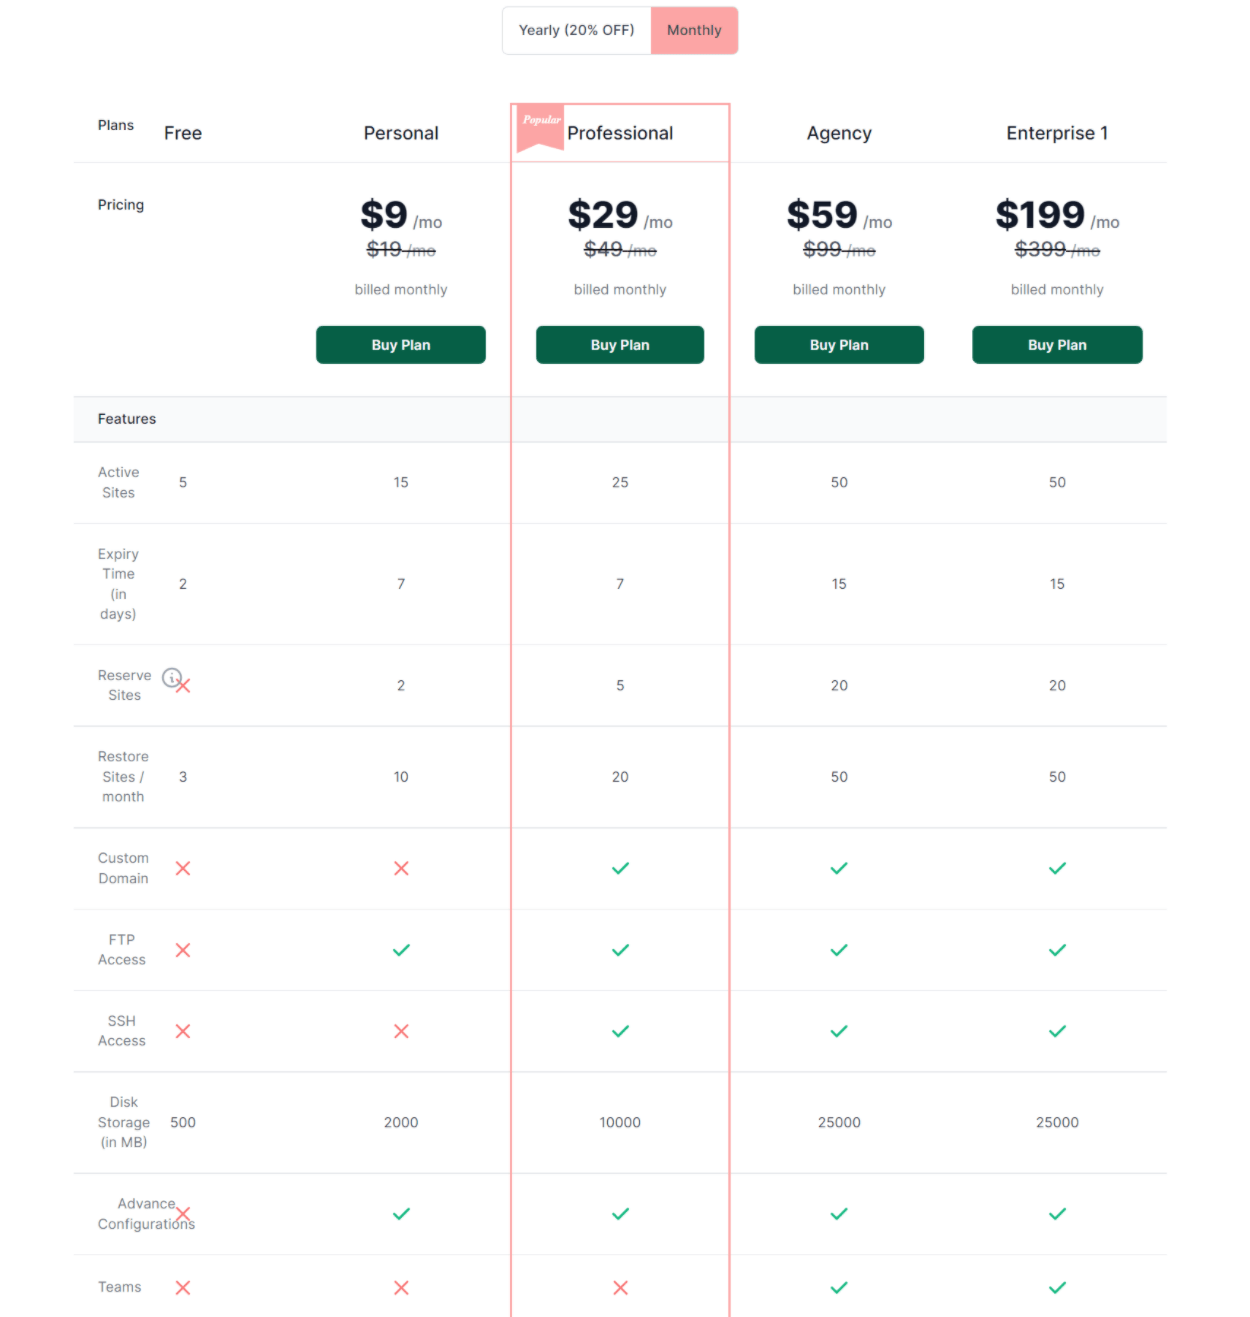
Here are the pricing plans – you’ll also get 20% off if you pay annually:
Final Thoughts on InstaWP
Overall, I was very impressed with InstaWP.
InstaWP isn’t the first tool to offer these kinds of one-click sandbox WordPress installs. However, I do think it’s gone further than the other tools that I’ve used in terms of the useful features that it gives you access to.
For example, let’s say you’re a casual user who wants to test plugins and themes. The Chrome extension makes it super simple to spin up new installs right from WordPress.org without needing to manually install the extension.
If you’re building client sites, then you also get a lot of handy workflow features:
- You can use configurations and templates to save time when starting a new project.
- You can quickly edit code or access the database in your browser, which saves time.
- You can white-label the domain name to create a custom experience for your clients.
- When you’re finished, you can easily migrate it to live hosting using the Migrate Guru integration. Or, you can also pull it down to LocalWP if needed.
Finally, if you sell plugins or themes, you also get useful features:
- You can save a template of the exact configuration that you want to share with people. Most importantly, you can pre-configure your plugin in an optimal way to ensure people have a good experience.
- You get shareable links. You could add this link to your landing page or share it in another way. People just need to click that link to create their site.
- You can ask for people to enter their emails to use it for lead gen (and minimize wasted resources).
- If you want to create a custom experience, you can white-label the landing page with your own logo and domain name. You can also customize the email that people receive.
If you want to test it out, you can sign up for the free version to see how things work.
However, most of the unique features are in the paid version, so you’ll want to upgrade for the best experience.
0 comments:
Post a Comment