If you have an eCommerce store, product search is incredibly important.
A significant chunk of your shoppers will rely on product search to find the products that they’re interested in and shoppers who use product search typically convert better than those who don’t.
That’s to say, finding ways to improve your store’s product search can have a positive effect on your store’s revenue and bottom line.
In our Doofinder review, we’re going to take a look at a dedicated eCommerce search solution that can improve your store’s search in a number of different ways, including both functional improvements as well as new features to help you better market products in search.
Doofinder works with any eCommerce platform, including dedicated support for WooCommerce, Shopify, and Magento (among others).
Keep reading our hands-on Doofinder review to learn more about what it offers, how it works, and how you can set it up on your own eCommerce store.
Doofinder Review: A Look at the Features
The high-level benefits of Doofinder are that it helps you:
- Sell more products. Doofinder claims that it can boost your sales by up to 20%.
- Make your store’s search more user-friendly (which also helps with selling more products).
It’s a complete search solution for eCommerce. Once you set it up, Doofinder will index all of your products on its own servers, which eliminates the heavy strain that product search puts on your store’s database (especially on WooCommerce). You also have the option to index other types of content, like blog posts.
In addition to creating a more accurate search index on the backend, Doofinder also offers its own frontend search overlay that offers improvements over your store’s native search.
To create a better search experience, Doofinder offers features like:
- Autocomplete search with real-time results – start displaying suggested search results as soon as a shopper starts typing.
- Smart search for accurate results – smart search uses natural language processing (NLP) to offer more useful results. For example, filtering out typos, using synonyms to identify other relevant products, etc.
- Faceted navigation – you can add faceted filters to let shoppers filter results by details like price, color, size, etc.
- Personalized results – Doofinder’s AI lets you offer personalized search results to each customer.
- Image search – let shoppers search by uploading images from their phones.
- Voice search – let shoppers use their voice to search on mobile devices.
- Geolocation optimization – optimize search results based on where shoppers are searching from.
Then, you also get features to help you market your store and products in search results:
- Promote products – you can choose certain products to promote by ranking them higher in relevant search queries.
- “Searchandising” – display banners and promotions associated with specific search terms. For example, you can show a banner for a special sale that’s related to the products a person is searching for.
- Real-time statistics – learn what people are searching for and which results they click on the most.
Doofinder eCommerce Platform Support
In this article, we’re going to focus on using Doofinder with WooCommerce because we’re a WordPress blog. However, Doofinder also offers built-in integrations for other popular eCommerce platforms including:
- Shopify
- Magento
- PrestaShop
- Shopware
Beyond that, you can also manually integrate Doofinder with other platforms or custom solutions just by submitting a product data feed and adding some JavaScript to your site.
How Doofinder Works – A Live Example
Now, let’s go hands-on with Doofinder. In this first section, I’ll show you how it works on the front-end by looking at the Shopify-powered demo. Then, in the next section, I’ll show you what it’s like to configure Doofinder on my own WooCommerce store.
First off, if you want to experience the live demo yourself, click the button below and start playing around with the search:
The demo is powered by Shopify, but you’ll get all of the same features on WooCommerce or other eCommerce platforms.
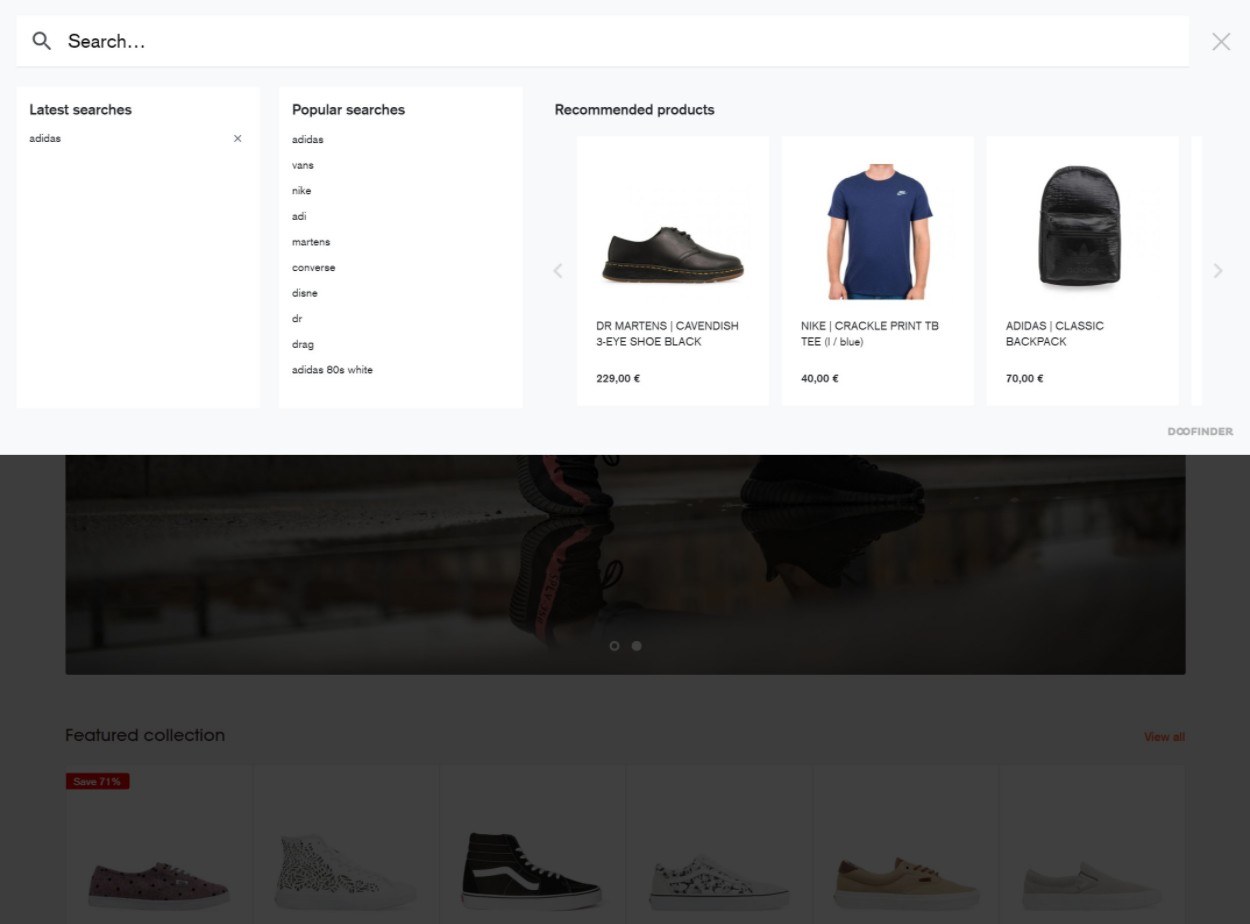
The search experience starts off with the Doofinder search overlay. On the demo site, this overlay opens as soon as a user clicks into the search box, but you can also wait until a user starts typing to trigger it:
You can start off by recommending popular searches and products, which helps you promote key products.
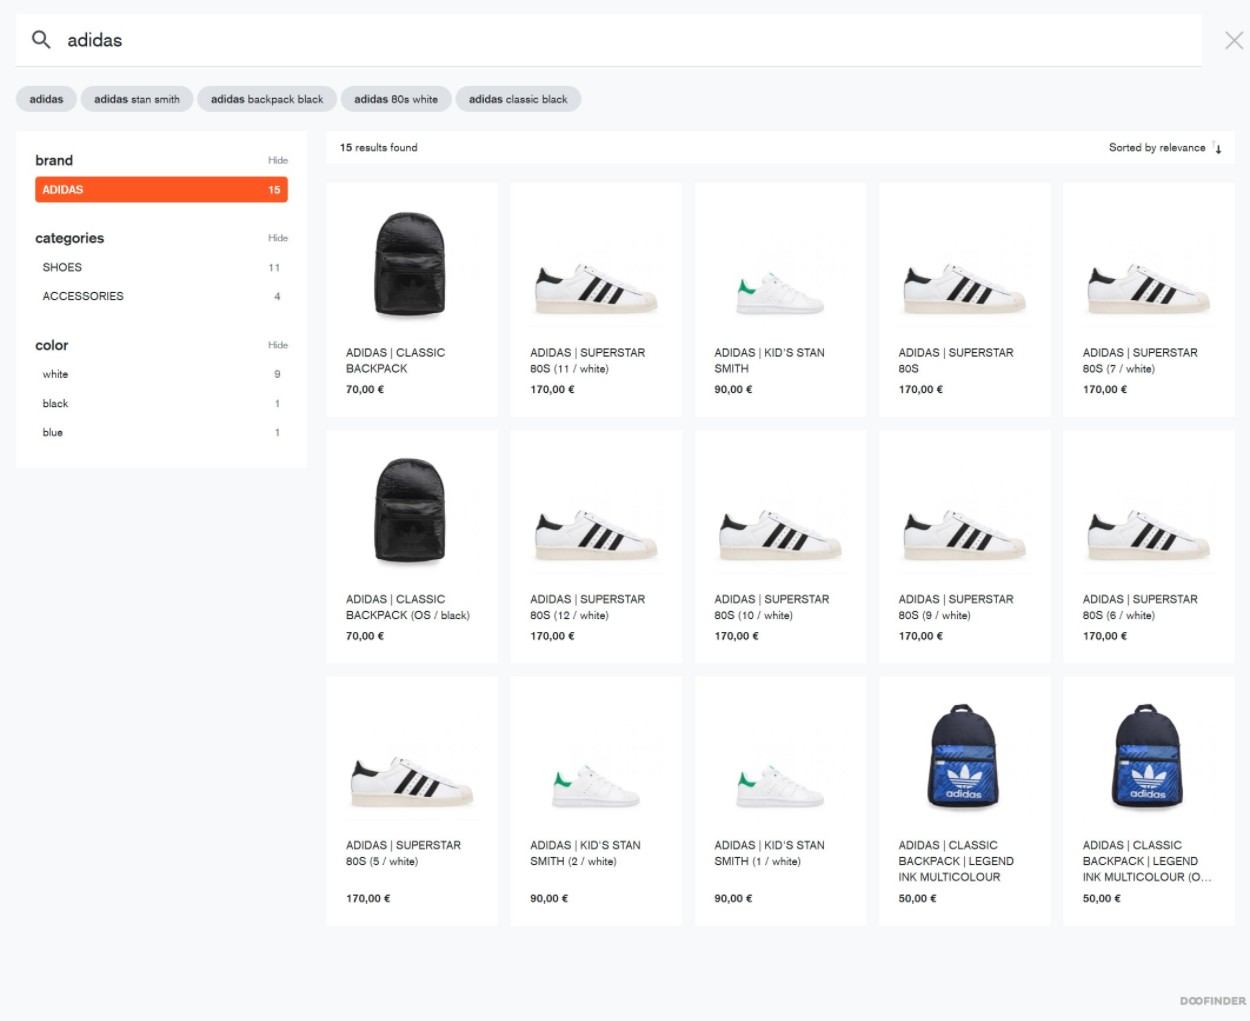
When a shopper starts typing, they’ll see instant product results based on their query. Additionally, you can give them faceted filters, which you can see on the left.
Another thing I like here is that Doofinder will continue to suggest search queries based on the user’s query. For example, I entered “Adidas” so Doofinder also suggests “Adidas backpack” as a query:
If a shopper clicks on one of the product results, they’ll go straight to the actual product page on your store.
How to Set Up Doofinder on Your Store
Connecting your WooCommerce store to Doofinder is super easy thanks to a dedicated integration plugin at WordPress.org.
I imagine the same is true of Shopify, Magento, and other dedicated integrations, though I didn’t personally experience it.
Basic Setup
To start using Doofinder on your WooCommerce store, you’ll need to:
- Install the plugin from WordPress.org.
- Register for a Doofinder account. More on pricing next, but you get a free trial that allows unlimited usage for 30 days (with no credit card required).
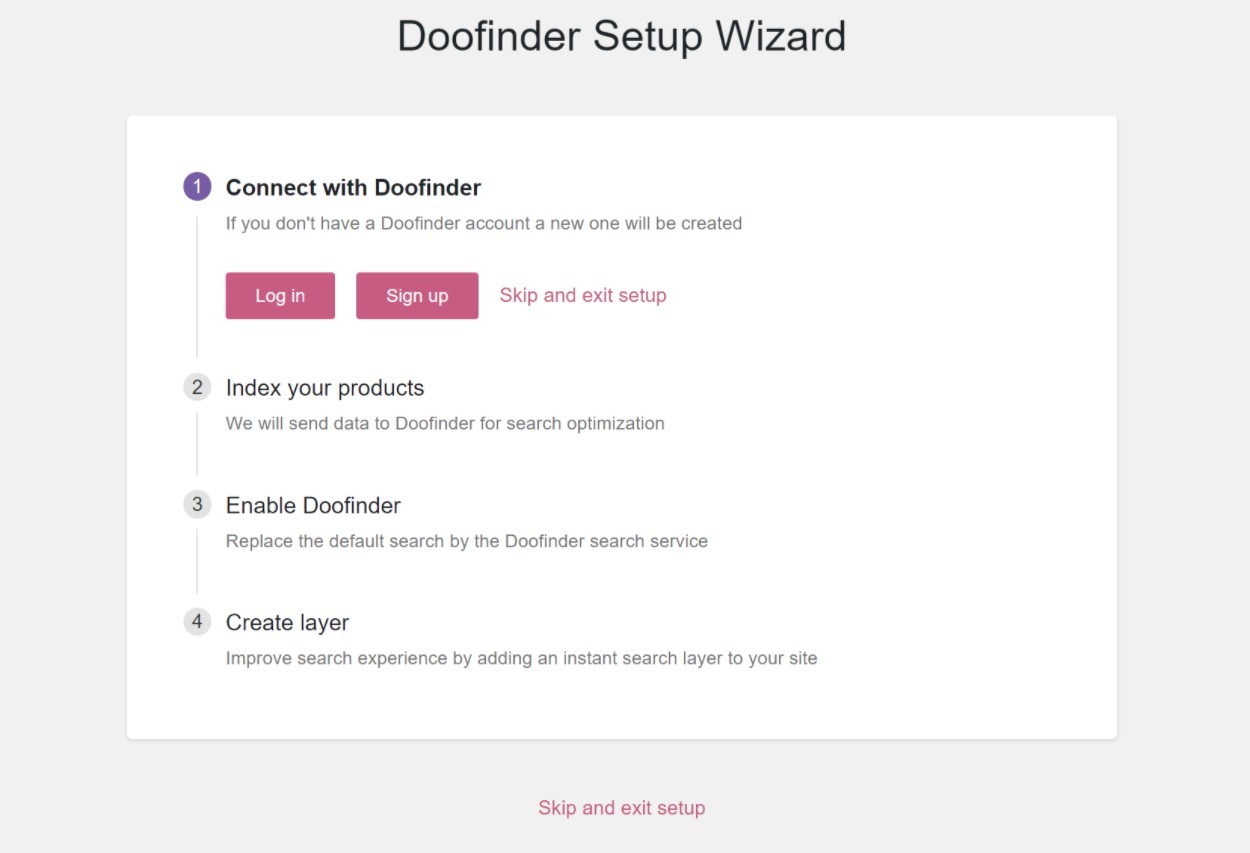
When you activate the plugin, it will prompt you to launch a setup wizard.
First, you’ll need to either log in to your Doofinder account or sign up for a new one:
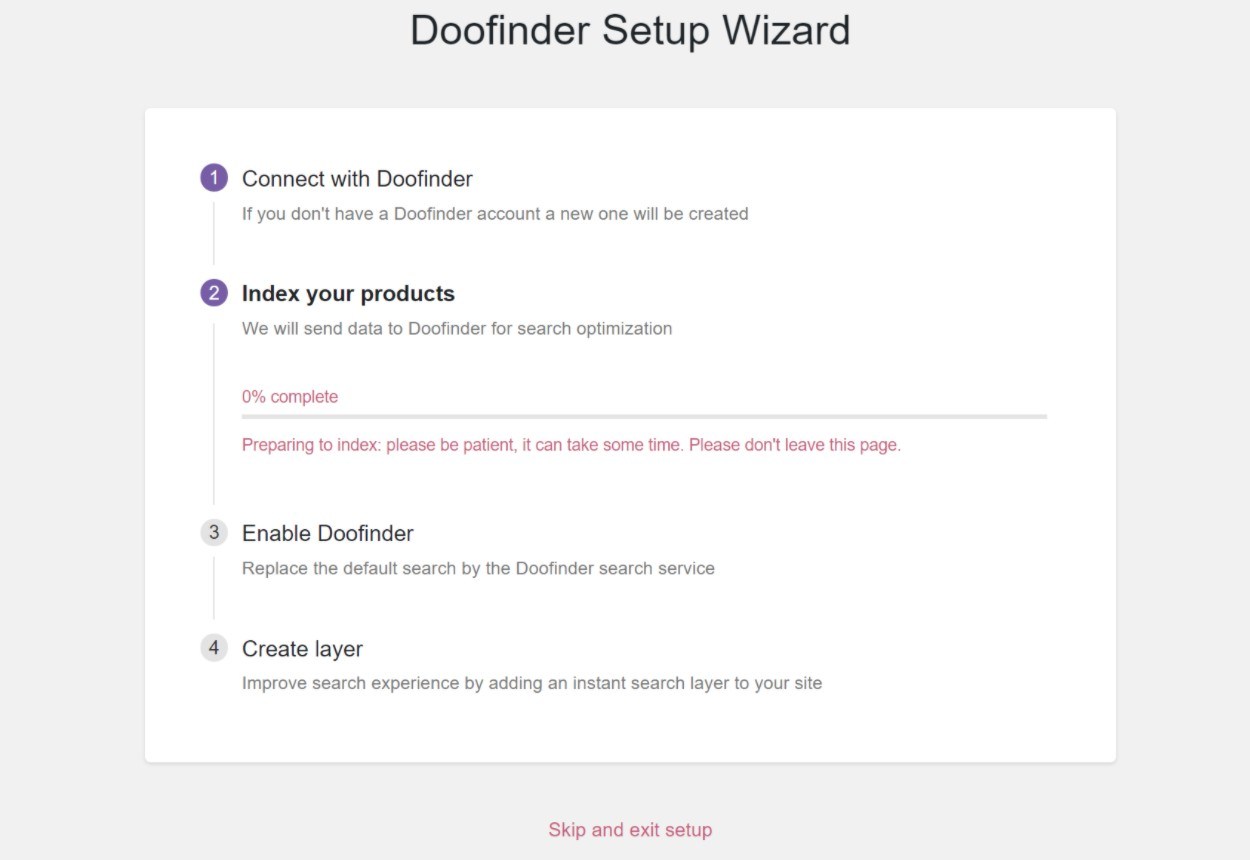
Then, the rest of the steps happen automatically. Doofinder will move through indexing your products and enabling a “search layer”:
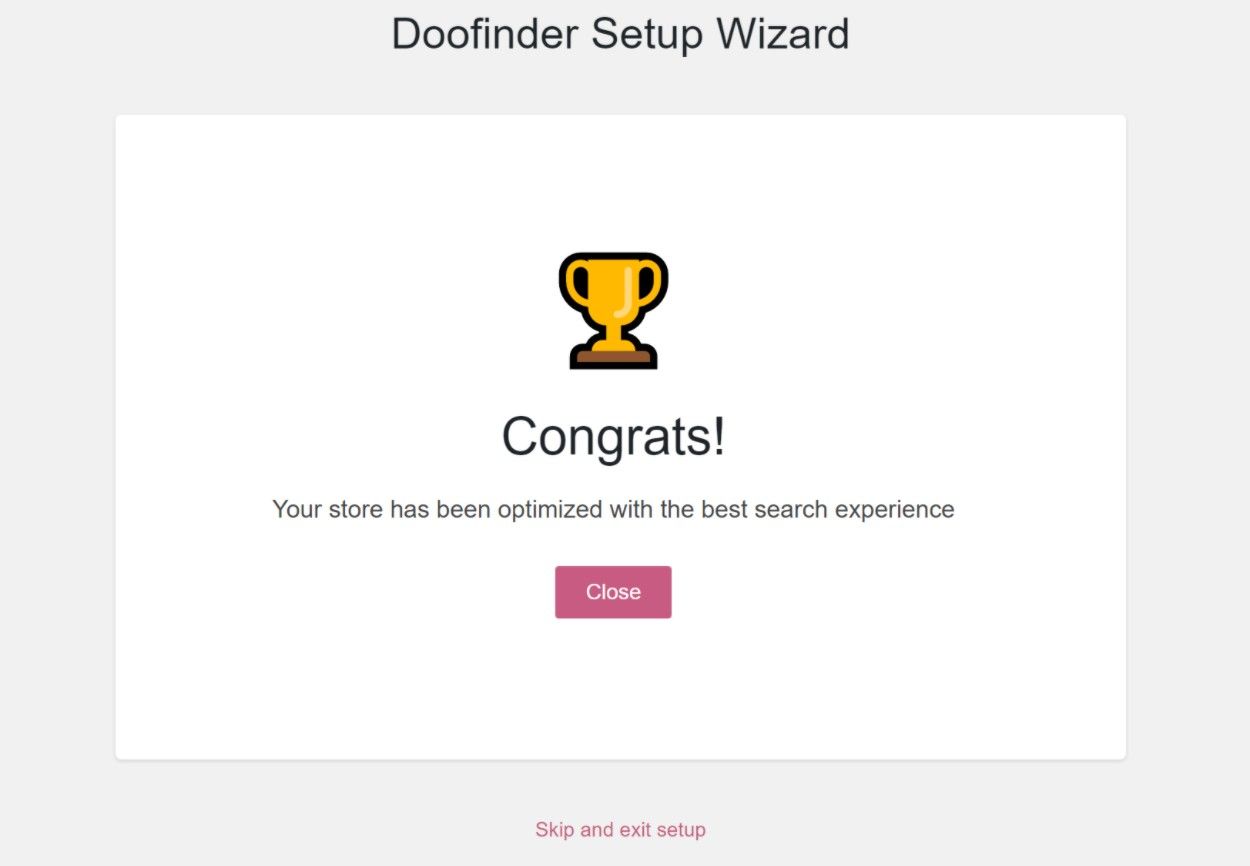
And then you should see a success message:
That’s literally it. I had a working Doofinder search overlay on my site within less than a minute of installing the plugin.
The basic search layer starts working right away with your existing search box, which is really cool.
My theme already had a search box using the regular WordPress/WooCommerce search form and Doofinder started working with that existing form without any manual action by me. Most WooCommerce search plugins require additional setup, which is why I found this to be impressive.
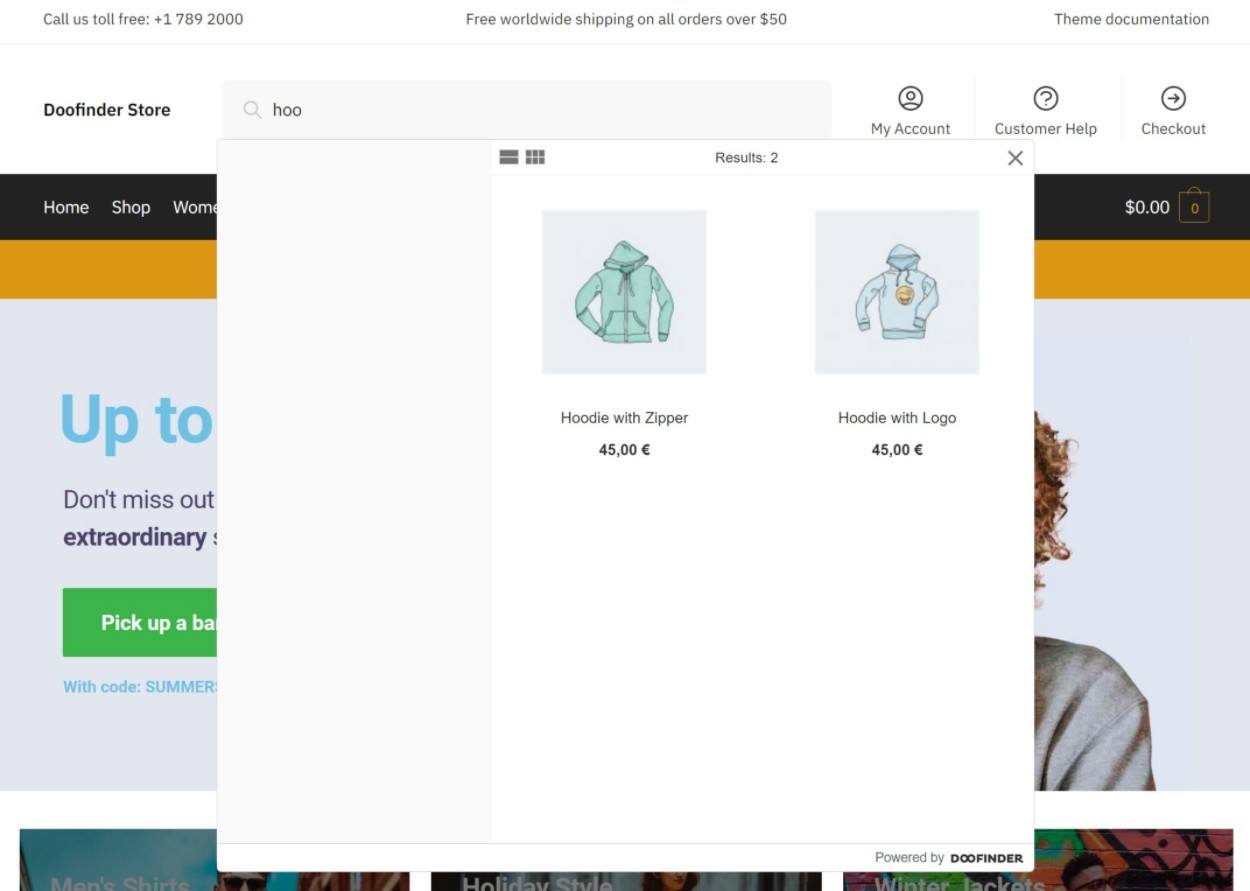
Here’s an example of what the default search overlay looks like with the Shoptimizer theme:
WordPress Settings
You’ll access most of the search feature configuration options from the Doofinder dashboard, but you do get some options in the plugin settings if you go to WooCommerce → Settings → Doofinder Search.
The Doofinder settings are divided into four tabs:
- Search – mostly pre-configured options to connect your site to Doofinder, but it does include a few other options.
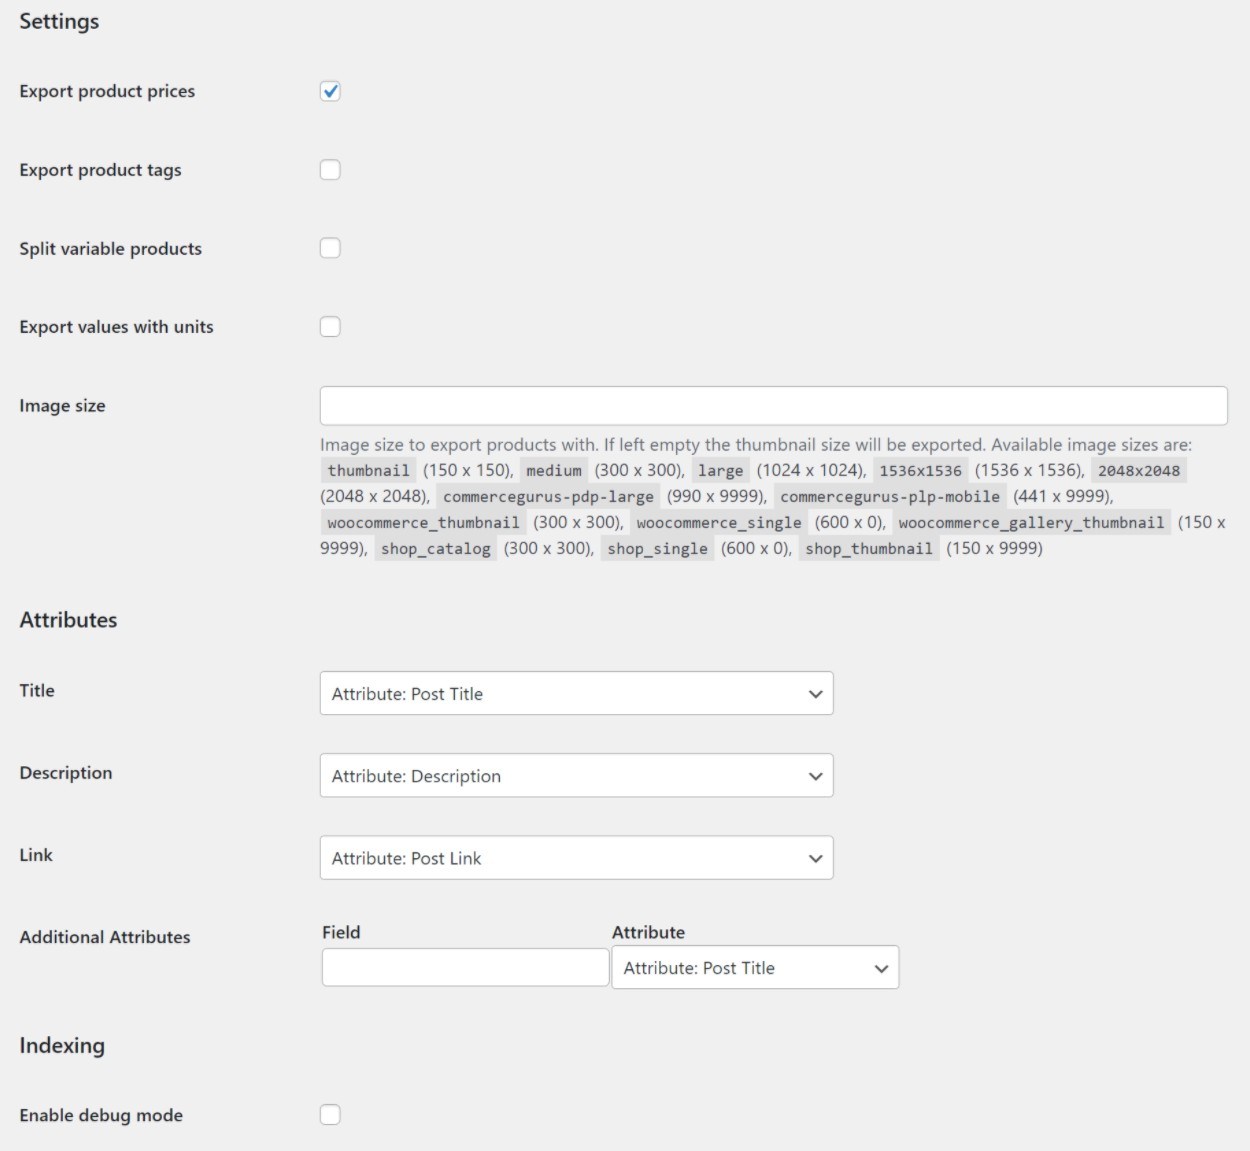
- Data – configure some basics like how to handle variable products, attributes, and image sizes.
- Indexing – this lets you manually reindex all of your products in Doofinder search.
- Log – a log section for developers.
For example, here are the options in the Data tab:
Doofinder Dashboard
For everything else about your search, you’ll use the Doofinder dashboard. The Doofinder dashboard is divided into three main tabs:
- Analyze – shows detailed search stats.
- Improve – access features to modify and improve your search.
- Setup – mostly offers one-time setup options, like choosing which faceted filters to use.
Analyze
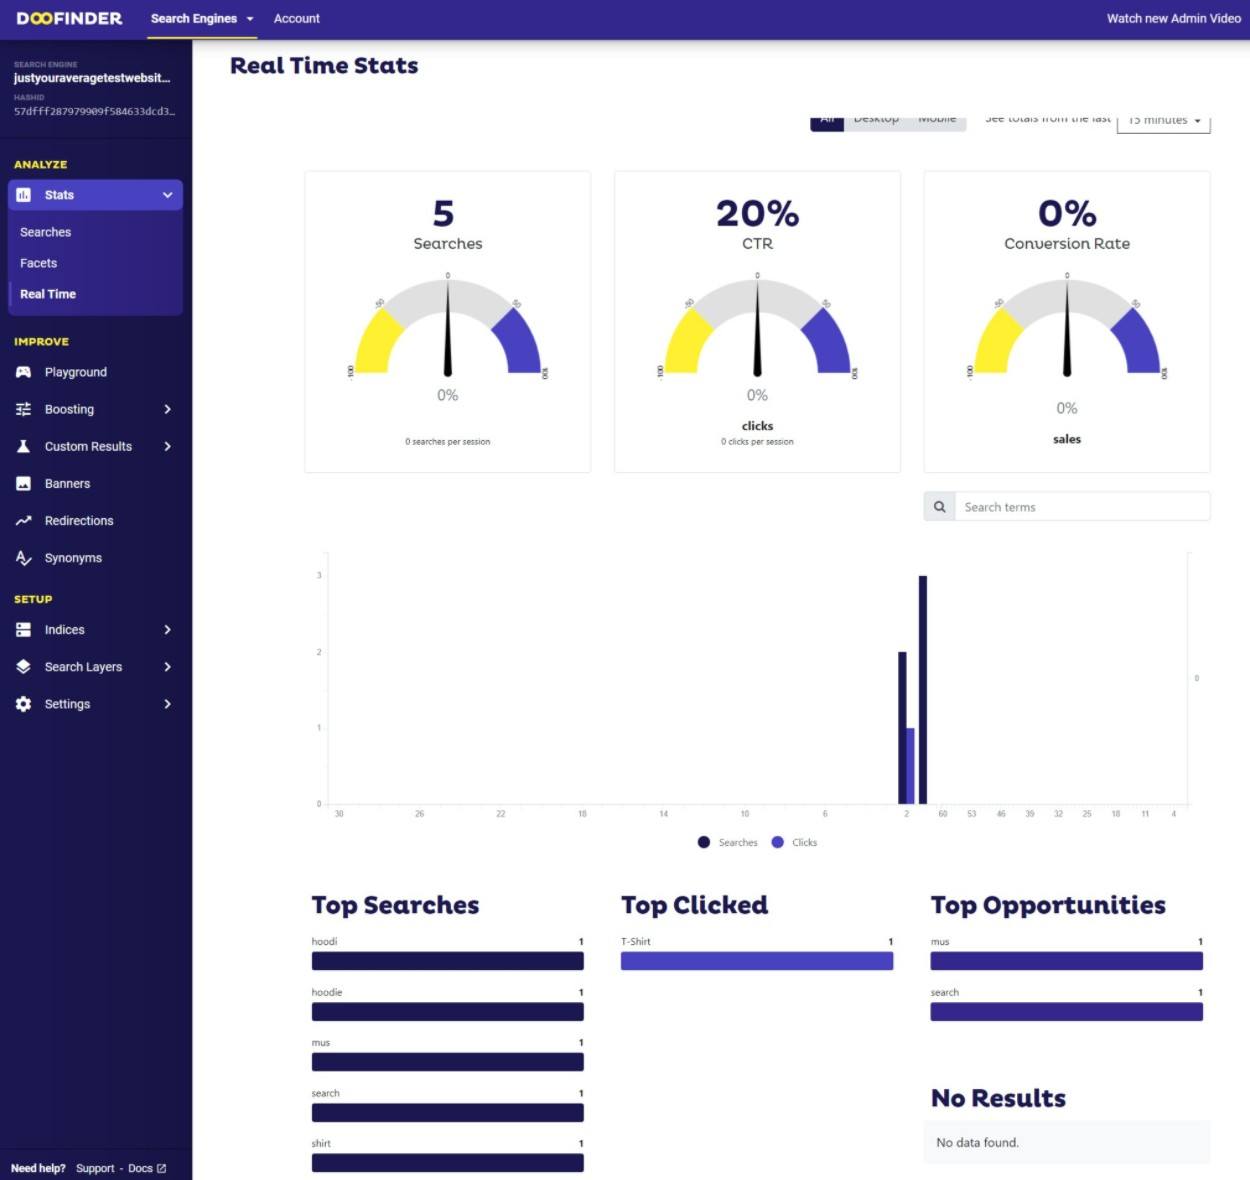
In the Analyze area, you can see searches, CTR, conversion rates, top searched terms, top clicked terms, top opportunities, and searches with no results:
You also get a separate area to track the usage of your facets (for filtering).
I like the analytics because you get a lot more detail than just, say, setting up search tracking in Google Analytics. For example, you can actually see which phrases led to the most product clicks and which generated no results.
Improve
The Improve area holds the meat of the Doofinder dashboard and is where you’ll spend the most time working on an ongoing basis. This is where you can refine how your search works and utilize the marketing features.
You’ll get six separate areas here:
- Playground – this gives you a sandbox where you can test how your search works by entering test phrases and seeing which results appear.
- Boosting – this lets you promote (or demote) certain products in search results.
- Custom Results – this lets you manually include or exclude specific items from the search results for specific terms. The idea is that you can guide shoppers towards items that you want them to purchase (or push them away from products that you don’t want them to focus on).
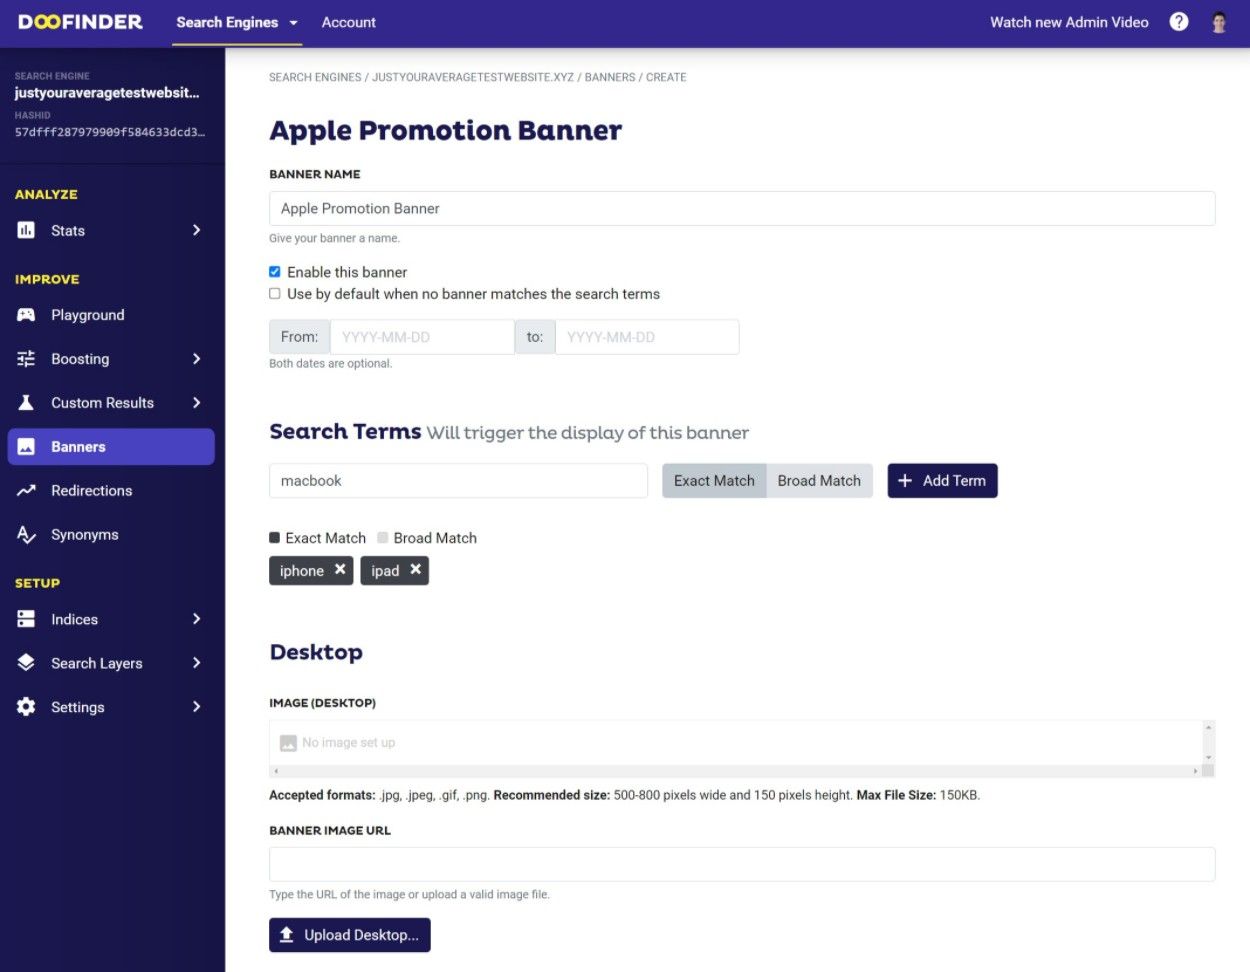
- Banners – this lets you set up the promotional banners that display on your search results. For example, if someone searches for “iphone”, you could display a banner that showcases your special promo for Apple products.
- Redirections – this lets you redirect certain search queries directly to a URL.
- Synonyms – this lets you manually set up synonym matches.
All of these tools are quite easy to use – let’s look at a couple of them.
First, there’s boosting, which is a pretty powerful option. You can either set up manual boosts or create automatic boosting rules to automatically boost certain products.
With manual boosting, you just choose the product that you want to boost and increase its weight in the results:
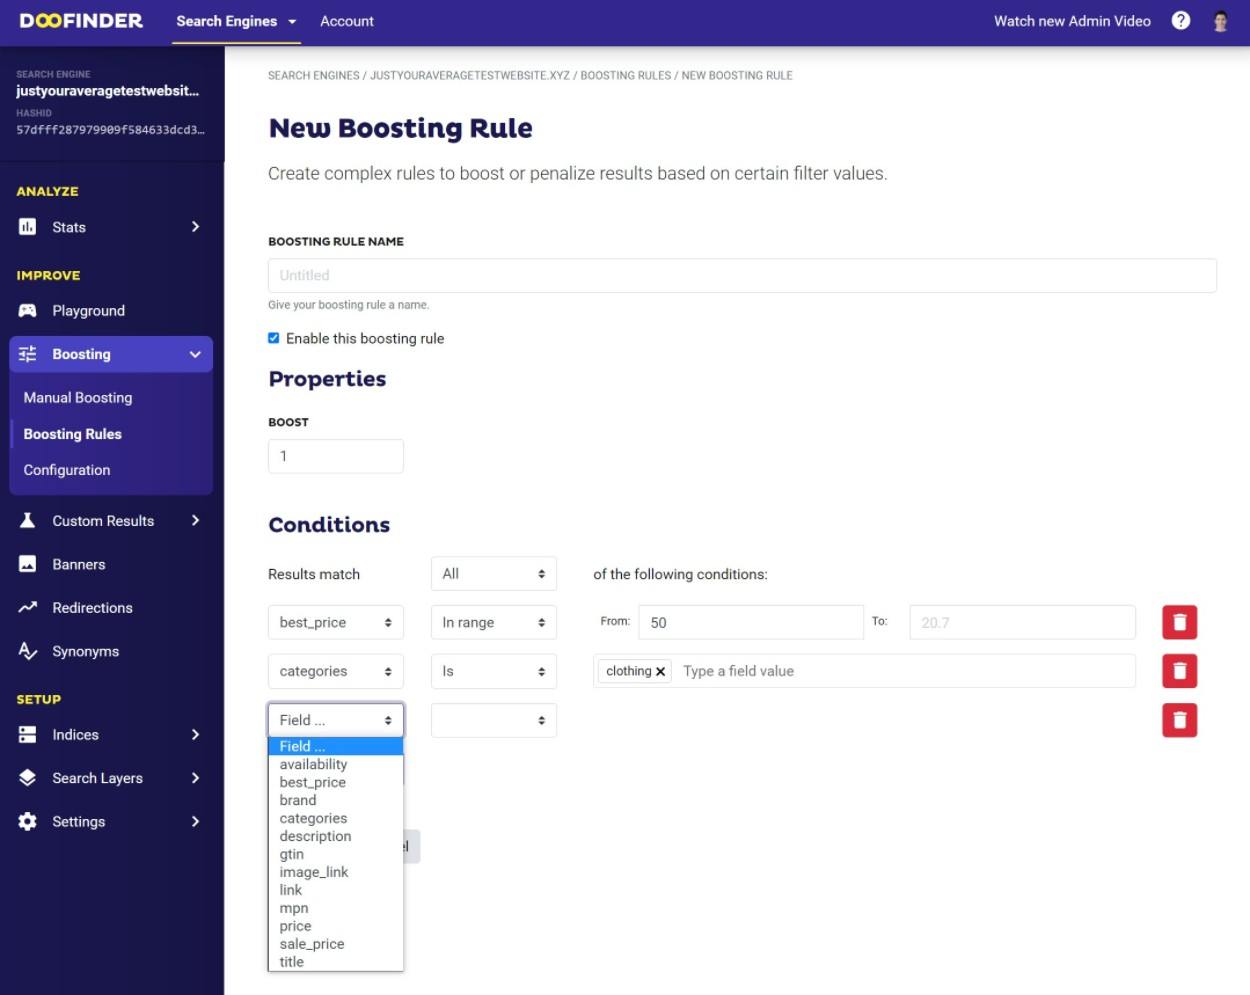
For boosting rules, you can set up your own conditions. For example, you could boost products in a certain category with a price that’s more than $100:
Another useful tool is banners. When you create a banner, you can:
- Schedule your banner to only run between certain dates.
- Link it to one or more search terms.
- Set unique images for both desktop and mobile.
- Add custom HTML code if needed.
- Set the target URL.
Setup
The Setup area contains mostly one-time setup fields to configure how your Doofinder search functions.
For example, this is where you can:
- Change the design of your search box.
- Set up the facets that you want to be available for your search.
- Choose which fields you want to search against and how to weight them.
- Set up custom sorting rules.
- Etc.
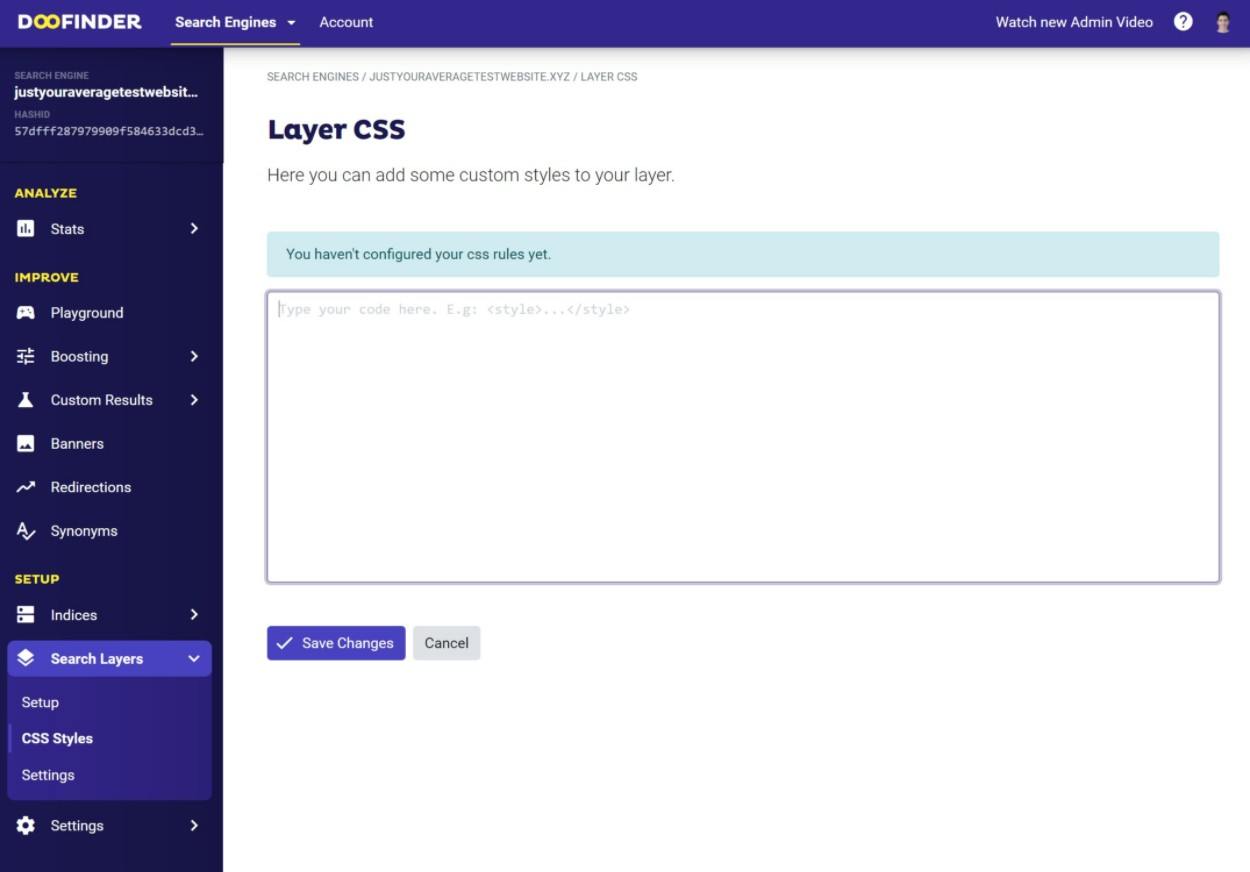
For example, if you want to customize the design of your search interface (again, that’s called a “search layer”), you can do that using your own custom CSS:
Unfortunately, there aren’t built-in options to customize the style/design, though it did blend in with my theme pretty well by default.
To customize the facets, search fields, and other technical details, you can go to the Settings area. For example, in the Facets settings, you can set up the fields that you want to make filterable:
Doofinder Pricing
Doofinder offers a 30-day free trial on all plans as well as a limited forever-free tier that might work for small stores.
All of Doofinder’s plans are billed based on the number of “requests” your store makes per month.
So – what is a “request”? A request is any time Doofinder’s server needs to give a response to your site.
There are four situations where your site makes a request and Doofinder’s server responds:
- Search queries – one search can result in multiple requests because of the real-time suggestions that display before a shopper might’ve finished typing.
- Indexing
- API Calls
- Crawler
I think this type of billing is a little confusing at first because it’s hard to know which plan your store will need just by looking at the pricing page. However, Doofinder offers two ways to help you figure this out:
- The 30-day free trial comes with unlimited requests. So during the first month, you’ll be able to figure out roughly how many requests your store requires without paying anything.
- You can reach out to Doofinder support and they’ll help you estimate how many requests your store requires.
In the long run, this pricing is probably fairer because you’re only billed on your exact usage instead of arbitrary metrics.
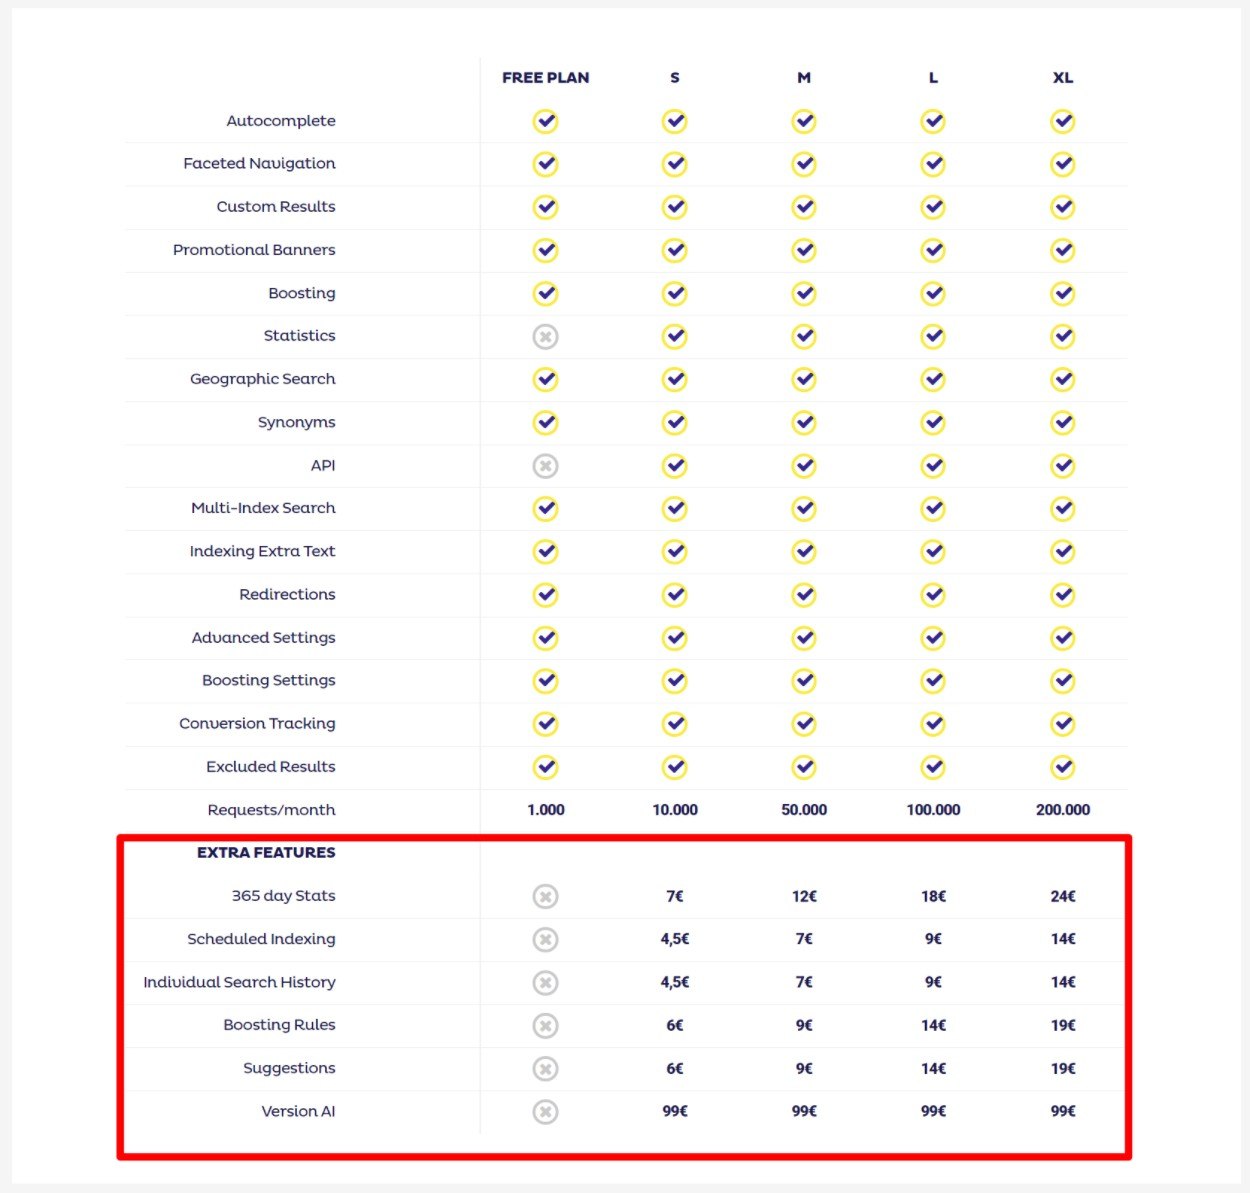
In addition to the request-based pricing, there are also flat fees to add certain features. You can see the fee for the special mobile search layer in the pricing table above (which is what gets you access to the voice search feature and other improvements).
There are also some other optional fees, which you can see in the comparison table below:
Final Thoughts on Doofinder
Overall, I was quite impressed with Doofinder.
Let’s start at the beginning – the setup process was one of the easiest and most seamless that I’ve experienced with a WooCommerce search plugin. Normally, if you want to use a search overlay (like real-time suggestions), you need to replace your existing search with a dedicated search form from the plugin.
For example, if you were using the native WordPress search form, you’d need to replace that with a shortcode or widget from the plugin. But with Doofinder, it starts working right away using your existing search box without requiring any extra setup.
From there, you get a user-friendly search interface and lots of options for customizing how it works, including tools to promote certain products and deals.
The search interface is also quite speedy, which is important for user experience. And, because all of the heavy lifting and indexing happens on Doofinder’s servers, you can lessen the load on your store’s database/server, which should improve performance.
Overall, if you want to improve your store’s search experience, you should definitely consider it. The setup process only takes a few minutes and you get a 30-day free trial with unlimited usage (and no credit card required), so there’s no risk for seeing how it works:




0 comments:
Post a Comment