
When browsing for products in your store, most customers will click through to the single product page and never return to keep browsing. The result is a potential loss in sales and customers.
One solution to this problem is to add a product gallery lightbox to your WooCommerce store.
This way, when a customer visits, they can open a lightbox for each product, see all the information they need and never have to leave the category page. Boosting conversions for you.
Sound good? Then follow along with this guide and by the end, you’ll know exactly how to add a product gallery lightbox to WooCommerce. The best part? You’ll be able to do it in 2 steps with the product preview plugin, WooCommerce Quickview.
How WooCommerce Quickview works
WooCommerce Quickview allows you to add a product gallery lightbox to your WooCommerce store.
How it works from the customer’s perspective
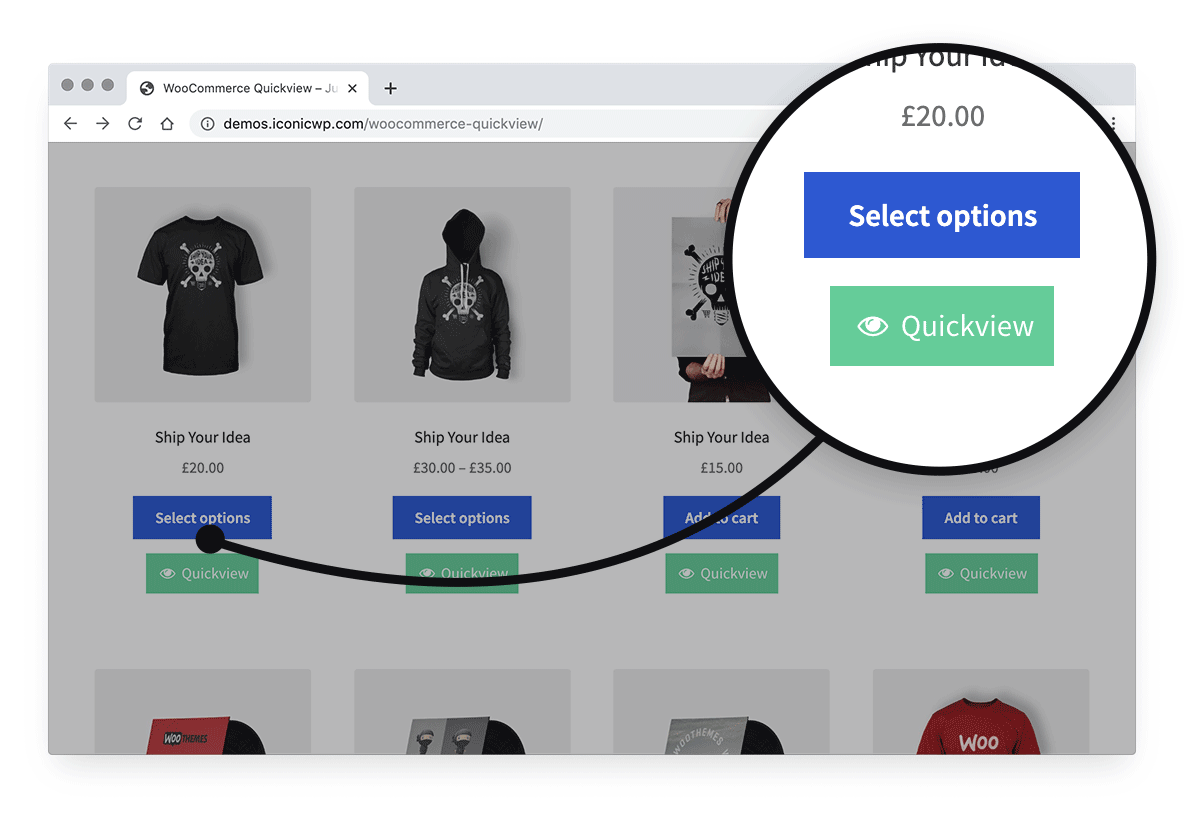
When browsing your main shop or category pages, a customer will see an additional Quickview button below each product. Once clicked, it will open up a product lightbox. Depending on what you set as the store owner, it can show the:
- Product gallery
- Price
- Title
- Description
- Sale banner
- Rating and add to cart
They’ll also be able to easily move between different products within the lightbox itself. Improving the customer’s browsing experience.
When the lightbox is closed, customers will be returned to the main shop or category page where they first clicked the button.
This seamless experience allows customers to fully browse your product inventory without page refreshes and clicks.
How to add a product gallery lightbox to your WooCommerce store
To add a product gallery lightbox to your WooCommerce store, all you’ll need to do is follow the next few steps.
Before we get started, you’ll need to install the product preview plugin, WooCommerce Quickview.
With WooCommerce Quickview installed, we can move onto customizing and setting up your product gallery lightbox.
Step 1: Customize the Quickview button
Before we customize what appears within the lightbox itself, let’s customize the appearance and location of your Quickview button. This is especially important to make sure your customers’ experience is as seamless as possible.
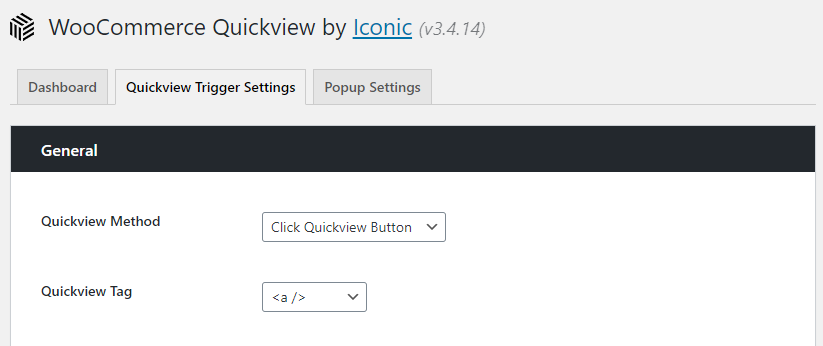
- Go to WooCommerce > Quickview.
- Click the Quickview Trigger Settings tab.
Here, you’ll be able to pick whether you want to display your product lightbox on hover (when the user’s mouse moves over the product) or by clicking the Quickview button itself.
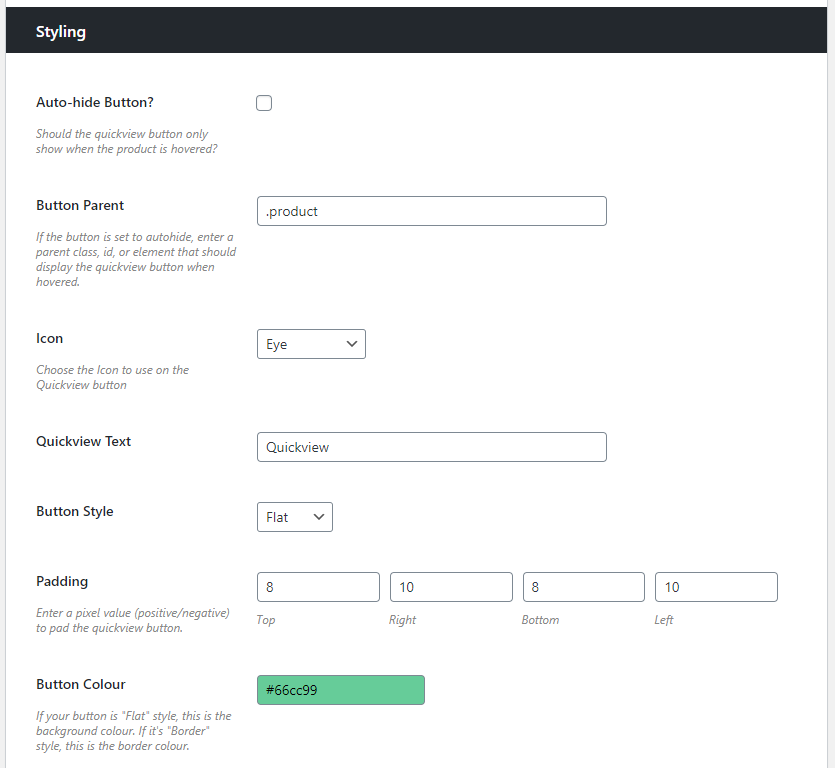
On this page, you’ll also find additional settings to help you tailor your Quickview or lightbox button to your store’s design. Including:
- Where your button is positioned
- How it’s aligned
- How much margin it has around it
- If it has an icon
- The button text, colors, and padding
Note: You’ll also be able to select if you want the button to display automatically, or not. If you’d like to add the button to your store manually, this documentation will help.
Now that your lightbox button has been styled, we can move onto customizing the product gallery lightbox itself.
Customize the WooCommerce Quickview lightbox
What you add to the product gallery lightbox, is up to you. WooCommerce Quickview allows you to completely customize this to give customers as much, or as little information as you like.
So if you want to provide your customers with just the basics, you could remove product reviews, metadata, ratings, and more. This way, you’re only showing the product gallery, title, price, and short description.
To customize your Quickview lightbox layout, do the following:
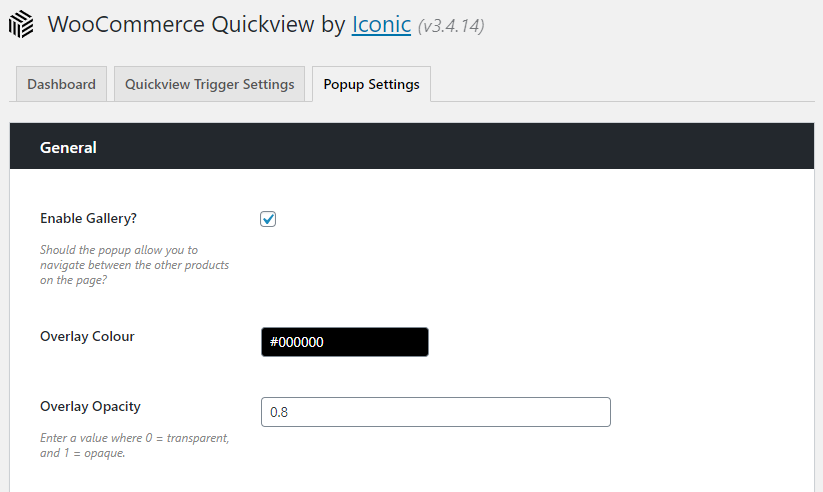
- Click the Popup Settings tab.
- The first section (General) allows you to decided if you want the lightbox to let customers navigate between the other products on the page, or not. In this section, you’ll also be able to change the overlay color and opacity.
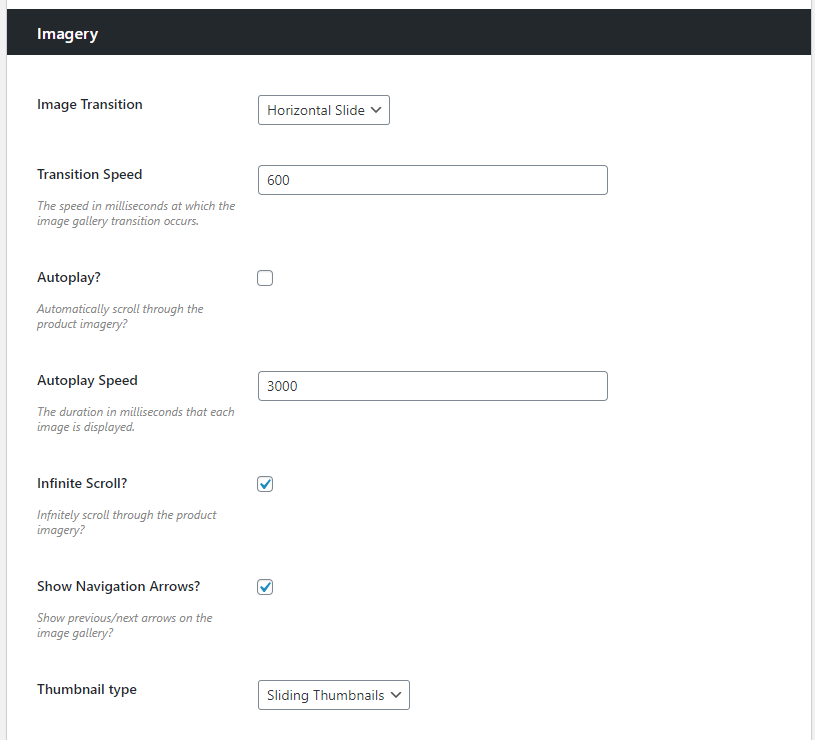
- The next section (Imagery) contains options for the product gallery element. Here you’ll be able to adjust the image transition, speed, arrows, and thumbnails.
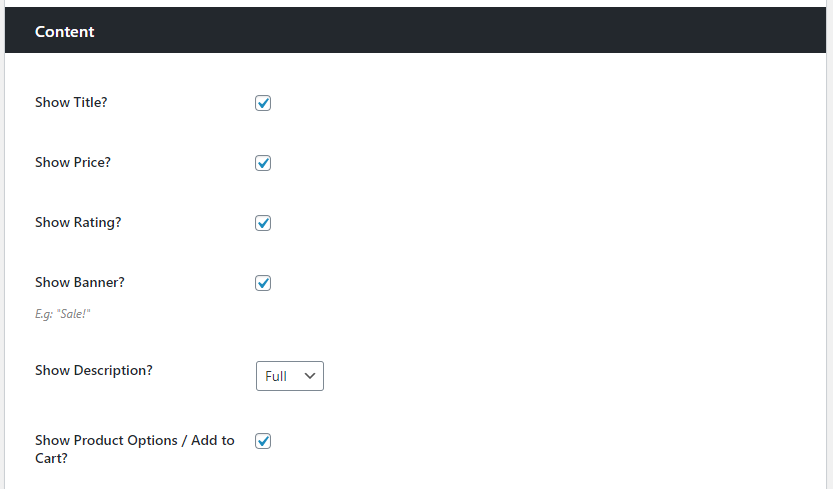
- After this, is the Content section. The settings here allow you to determine what product page elements you want to appear in your lightbox. Including the:
- Product title
- Price
- Rating
- Sale banner
- Description length
- Quantity and product meta
- Once happy with all settings, click Save Changes and your product gallery lightbox will appear in your WooCommerce store.

Add your product gallery lightbox to WooCommerce
That’s it, your WooCommerce store now has a product gallery lightbox up and running using WooComerce Quickview.
With the lightbox working its magic, you’ll be able to prevent customer clicks and provide a better shopping experience, resulting in more sales for your store.
Found this guide useful? Leave us a comment and let us know.
Related Articles
-

Want to add WooCommerce bulk add to cart functionality to your store? In this post, you'll learn how to use a WooCommerce bulk add to cart plugin to let shoppers…
-

Learn how to set a product variations price in WooCommerce with this step-by-step guide. Save time & create complex pricing structures for your attributes.
-

Here's a step-by-step guide that will take you through the process of converting WooCommerce into a Catalog Only store using a rock-solid inquiry and quotation management plugin.
-

Until now, there was no easy way to create a WooCommerce product catalog to list products in a neat and compact format. In this post, I'll walk you through how to do…
0 comments:
Post a Comment