The default quantity of your WooCommerce products may not seem like much to be concerned over. However, especially if you sell items that are usually purchased in sets or in bulk, increasing yours can smooth out the buying process for your customers and encourage more sales.
While WooCommerce doesn’t enable you to do this out of the box, pairing it with WooCommerce Default Quantity does. This plugin makes it easy to apply this change at the global, category, and individual product levels.
In this post, we’ll discuss some of the reasons you might want to increase the default product quantities in your online store. Then we’ll show you how to do it using the WooCommerce Default Quantity plugin. Let’s jump in!
Why You May Want to Change Your WooCommerce Default Quantity
In WooCommerce the default product quantity is one. This may not seem like it would cause a problem, especially since changing that number isn’t difficult for customers to do if you’ve included quantity selectors on your product pages:

However, there are some situations in which buying one of something isn’t useful. Dishes, hardware, and sometimes even tickets are rarely purchased singly unless customers are ordering replacements.
This is also an important consideration for wholesalers. Chances are the retailers who purchase your products aren’t ever going to need just one of anything.
In these cases, leaving the default quantity at one requires that your buyers first realize that they need to change it, and then remember to actually carry out that task. If shoppers routinely order one plate instead of eight, there’s a good chance you’ll see more customer service emails in your inbox.
Even if your products aren’t best bought in sets or bulk, increasing the default quantity from one can encourage shoppers to buy more than they might otherwise. Not having to touch the quantity selector speeds up your purchasing process, reducing potential friction for customers and making it more likely they’ll complete their order.
How to Change the WooCommerce Default Quantity (3 Methods)
While WooCommerce doesn’t enable you to change the default product quantity, the WooCommerce Default Quantity plugin does. Once you install and activate it, you’ll be able to adjust this feature using three different methods, which we’ve outlined below.
1. Set a Global Default Quantity
The simplest way to get started with this plugin is by setting a new global default quantity. By configuring this setting, you can change the number that initially appears in the quantity selector for every product across your site.
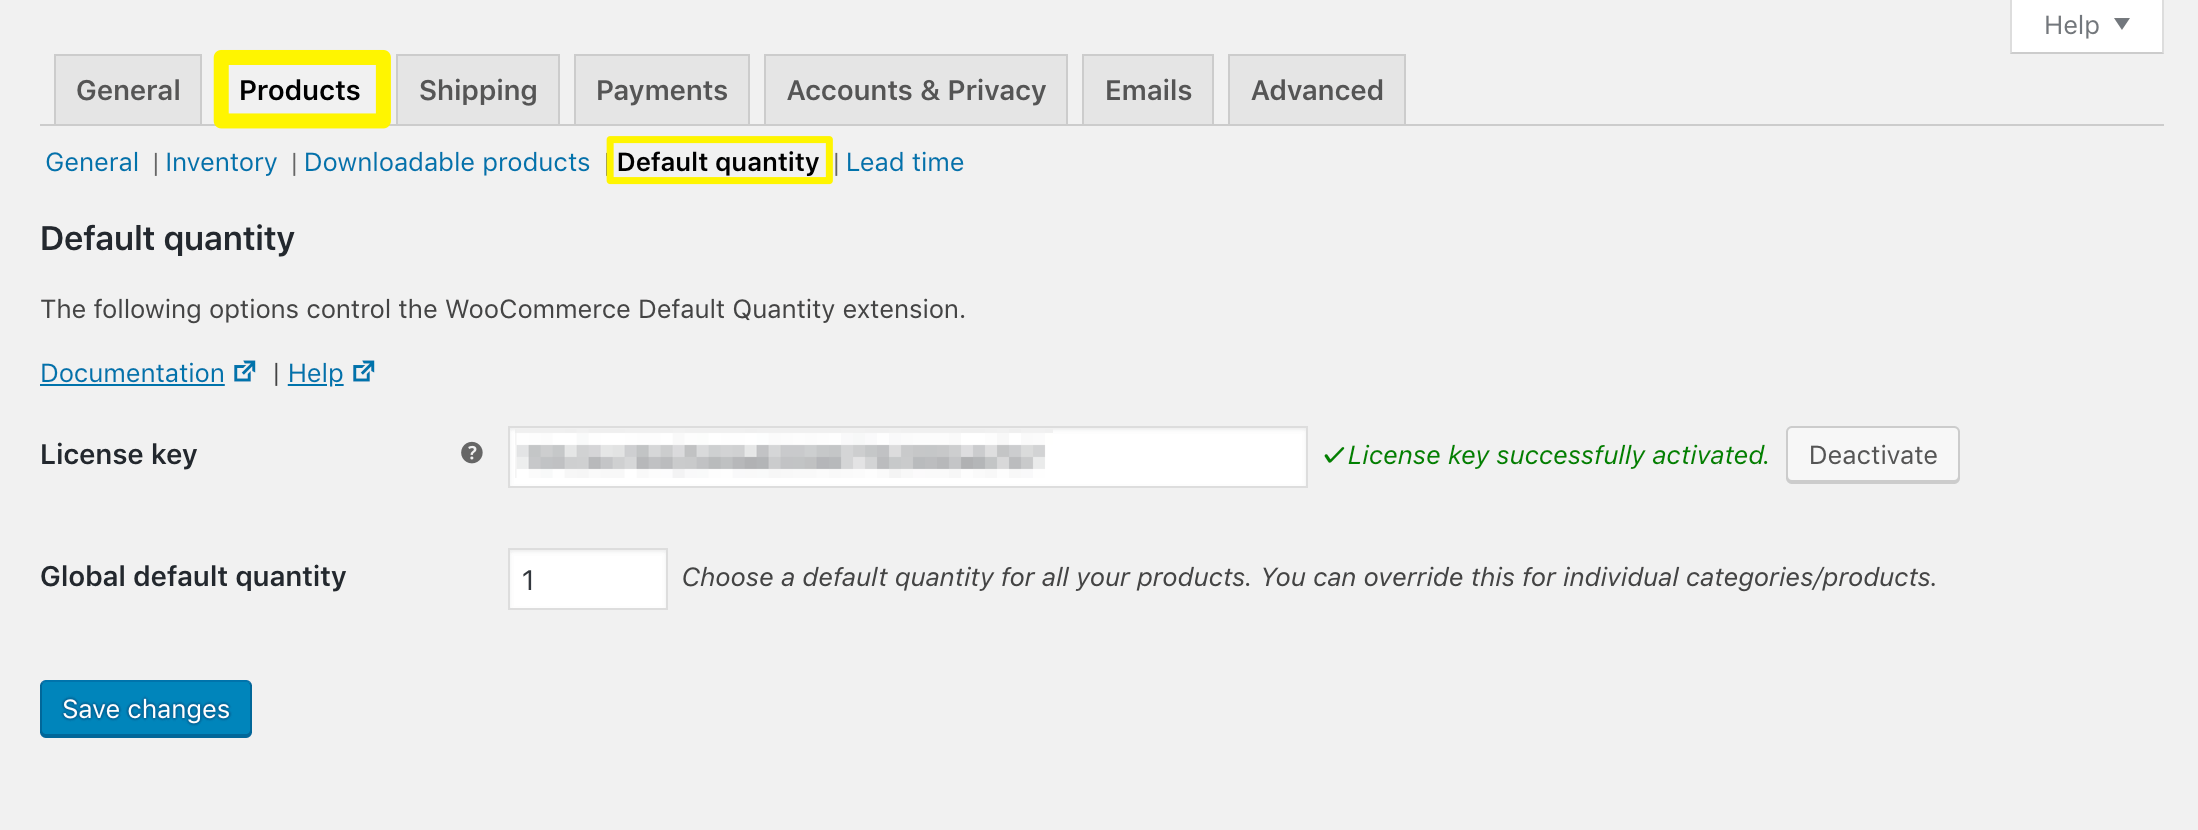
Navigate to WooCommerce > Settings > Products > Default quantity:

Here you can simply type the new default quantity into the relevant field. It will automatically be applied to your entire store, saving you the trouble of editing each product individually.
2. Create Default Quantities by Category
While the global setting is handy and can save you a lot of time and effort, it isn’t as useful if your products don’t all require the same default quantity. An alternative is to change this element by category.
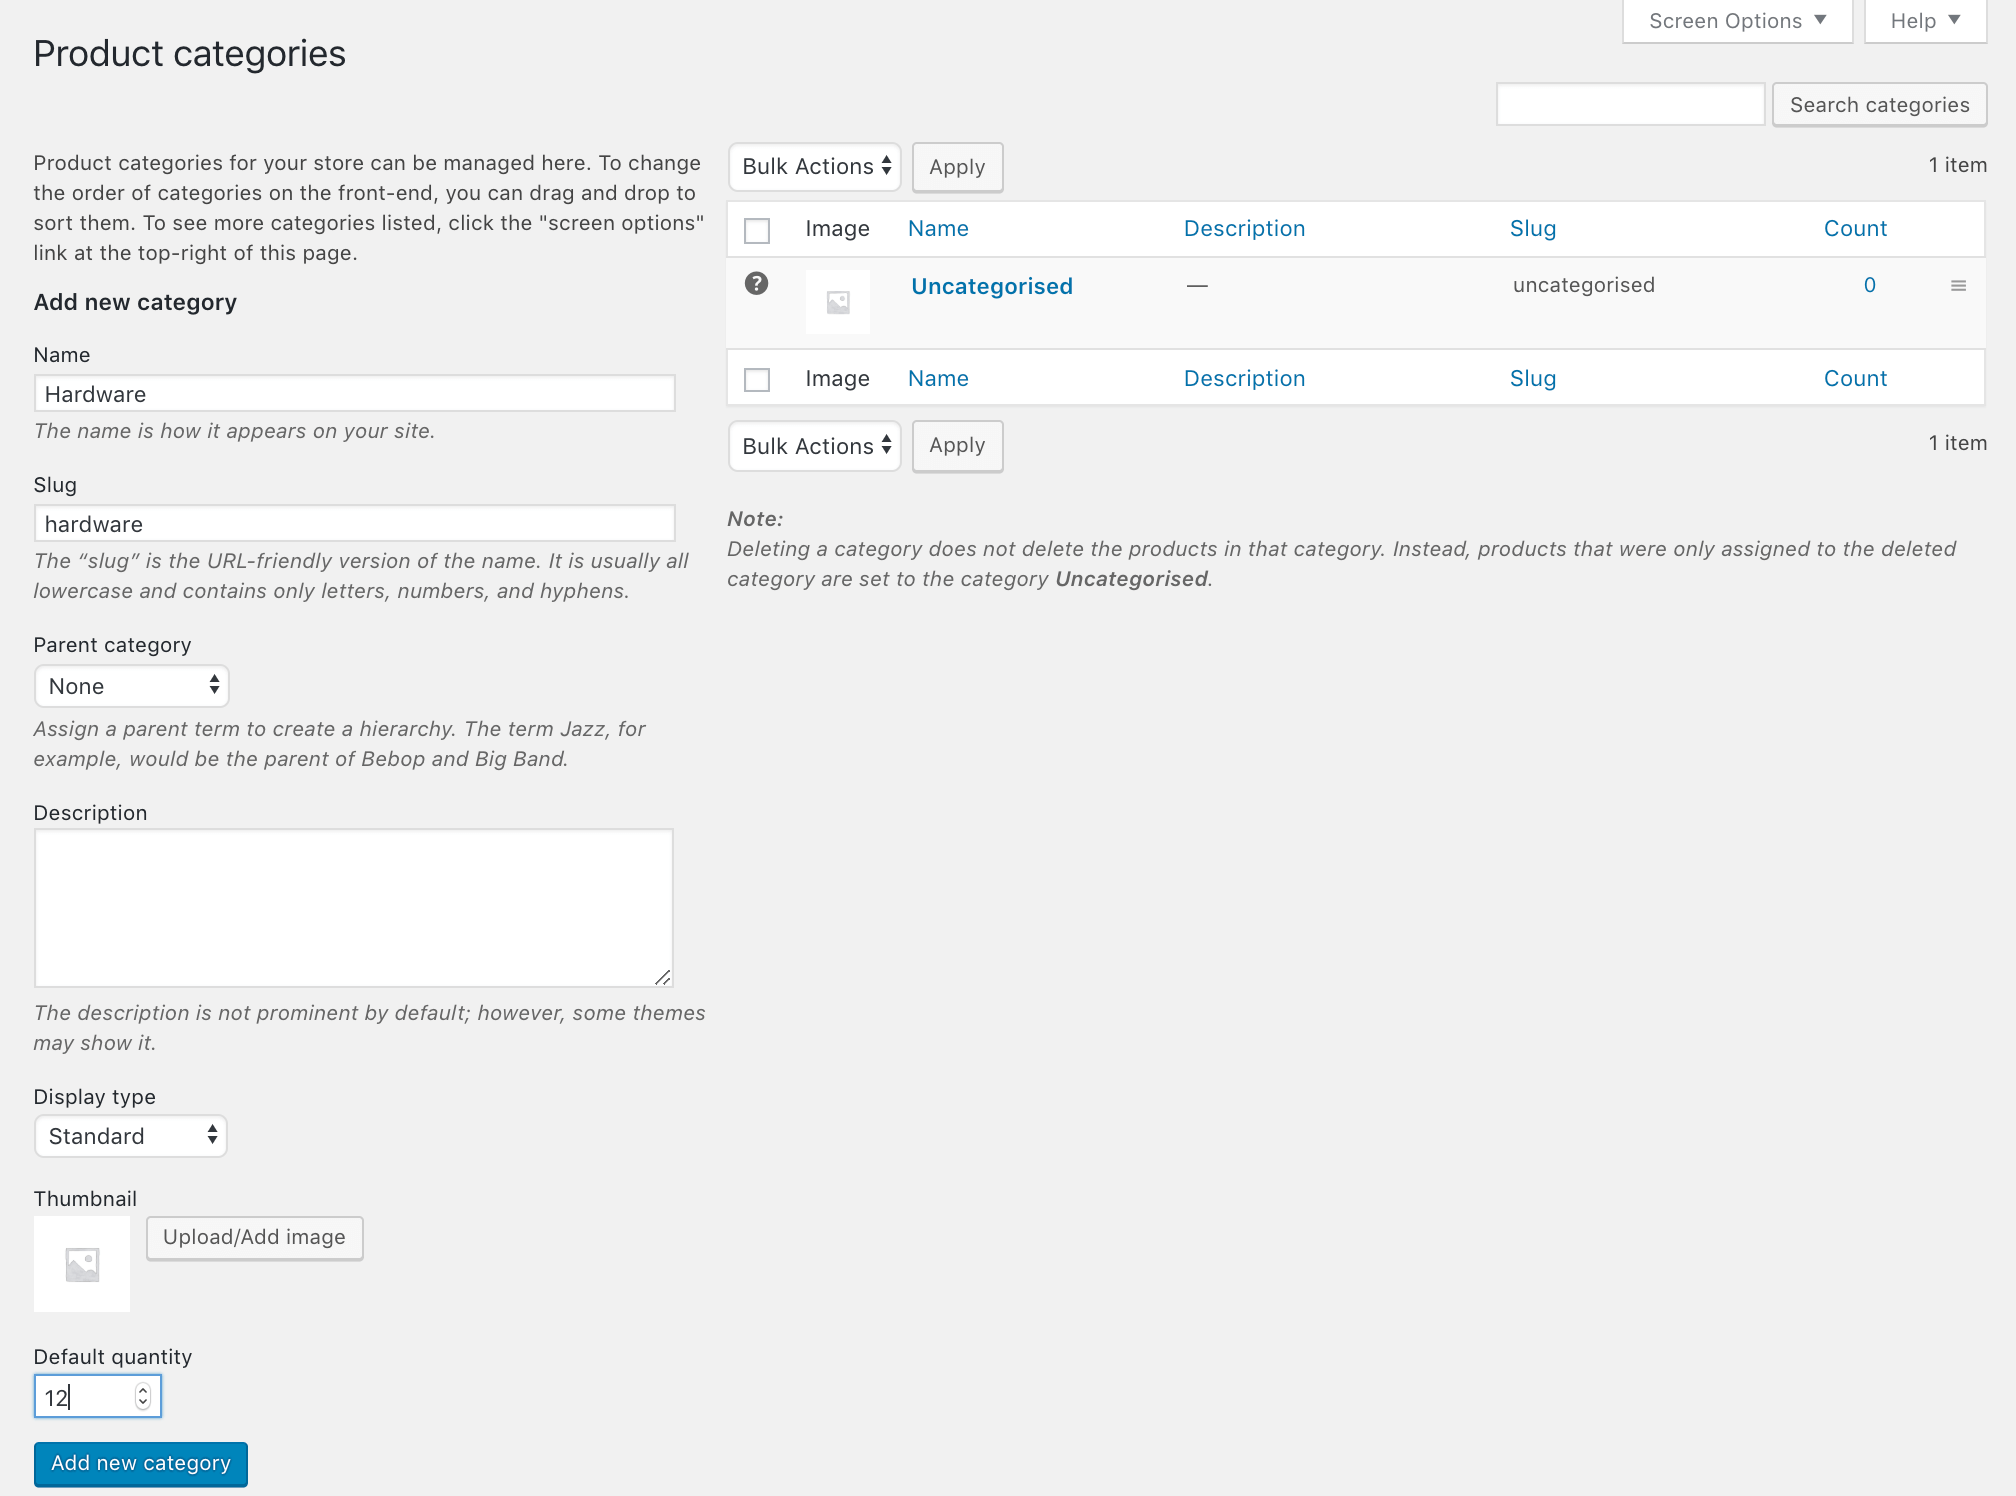
So, for instance, if you sell home improvement products, you might leave your global default quantity at one. Then customers won’t accidentally purchase a dozen power drills. For smaller items, such as drawer pulls, you can create a category with its own default quantity:

If you navigate to Products > Categories > Add New, you’ll see there is now a default quantity selector at the bottom of the page. The number you choose here will always override the global default quantity. Any products assigned to this category or its child categories will automatically inherit this setting.
To choose a new default quantity for existing categories, simply click on Edit below the title in the Product Categories list:

There will also be a default quantity selector here where you can make changes. Remember to click on the Update button when you’re finished.
3. Implement Default Quantities for Individual Products
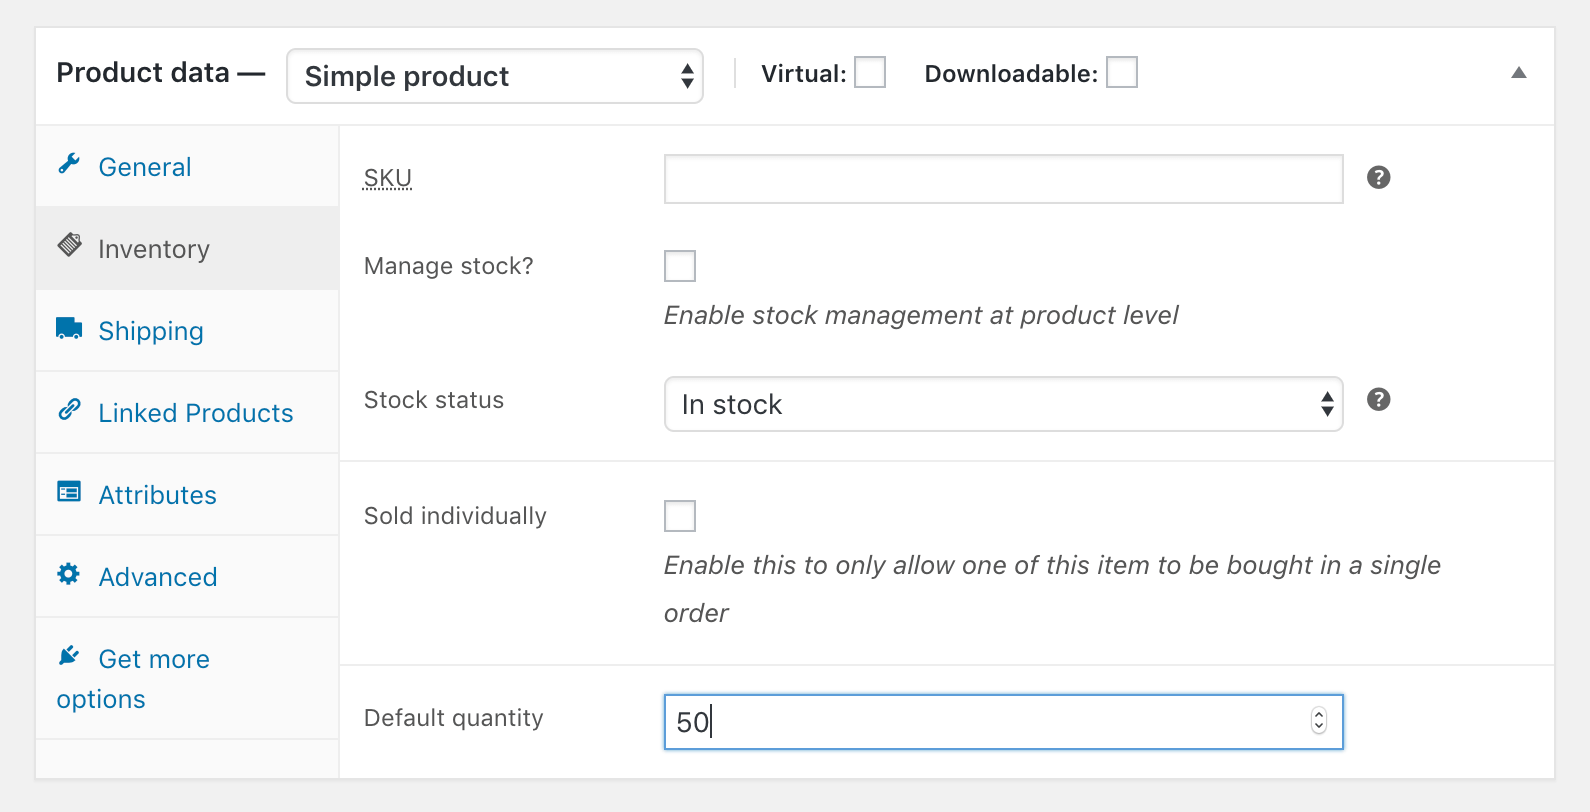
If you need to be even more specific in setting the default quantities for your products, you can always do so individually in the product editor. Access the relevant item’s page, then scroll down from the main editor to the Product data widget:

In the Inventory tab, you’ll see there is now a default quantity selector. You can change the number here to override any global or category-based plugin settings you’ve already configured.
It’s important to note that, if you’ve selected the Sold individually checkbox in the Inventory tab, the default quantity selector will become unavailable. Since customers can only purchase one of this item per order, there will be no quantity selector on the product page and therefore this setting isn’t relevant.
Additionally, if the default quantity exceeds the number of items in stock, the quantity selector on the product page will show the number of available items instead. For example, if you sell forks in sets of eight but only have two forks in stock, the quantity selector will display the number two, not eight.
Conclusion
Even small changes to smooth out your purchasing process can make a significant difference to shoppers. Increasing the WooCommerce default quantity from one can encourage more sales on your site, and make it faster for customers to buy products in bulk.
In this post, we showed you how to use WooCommerce Default Quantity to:
- Set a global default quantity.
- Create default quantities by category.
- Implement default quantities for individual products.

WooCommerce Default Quantity
Take control of your WooCommerce purchasing process and change your products' default quantities.
Get the PluginDo you have any questions about changing the WooCommerce default quantity? Leave them for us in the comments section below!
Featured Image Credit: Pexels.
Disclosure: WP Mayor is supported by its audience. When you purchase through links on our website we may earn an affiliate commission at no added cost to you. This does not influence our recommendations – we always recommend the best products and services available.


0 comments:
Post a Comment